


How to Use Wi-Fi Heatmap on a TP-Link Deco
This article introduces Wi-Fi heatmap feature in the Deco app, covering from creating floor plan, deco placement, simulation to signal test.
Before You Start
- Download the Deco app from the Google Play Store, the App Store, or by scanning the QR code below. Then follow the app instructions to set up your Deco network.

- Make sure the device and app version support the feature. Firmware upgrades may be required for certain models.
Note: The steps may vary depending on your device's operating system. Here we take the iOS system as an example.
Wi-Fi Heatmap
- What is Wi-Fi Heatmap
- How to Create Your Whole-home Wi-Fi Heatmap
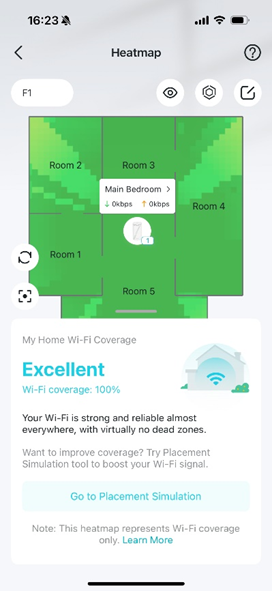
- How to Read Your Wi-Fi Heatmap
- How to Highlight Key Areas on Your Heatmap
Generate A Floor Plan
- How to Quickly Generate a Wi-Fi Heatmap from an Existing Floor Plan
- How to Edit a Room On Your Floor Plan
- How to Split a Wall On Your Floor Plan
- How to Merge Rooms On Your Floor Plan
Device Placement
Placement Simulation
- What is Placement Simulation
- How to Optimize Device Placement with Heatmap Suggestions
- How to Add a Virtual Device for Simulation On a Heatmap
- How to Compare Simulated Data with Your Actual Network Data On a Heatmap
Signal Test
- Which Devices are Compatible with the Signal Test Feature
- Why Signal Test Is Important for Accurate Heatmaps
- How to Run a Signal Test On a Heatmap
Wi-Fi Heatmap
What is Wi-Fi Heatmap
With a clear visual overview, you can quickly identify weak or dead zones that might need an additional Deco unit or repositioning of existing devices. The heatmap enables you to test different layout configurations, reduce interference, and optimize bandwidth distribution—ensuring reliable Wi-Fi performance throughout your space.
To make a heatmap, you can start by drawing or uploading your floor plan. Then mark physical obstacles—such as walls and doors—to simulate how they affect the Wi-Fi signal. After placing your Deco units on the plan, the heatmap visually reflects how the signal propagates, allowing you to adjust device locations for better coverage.
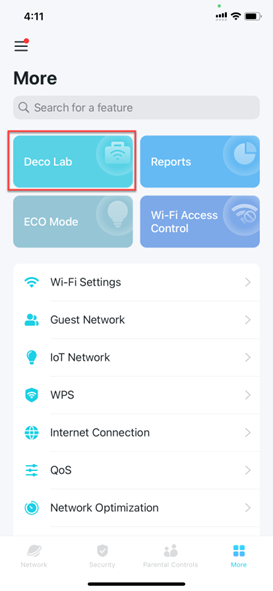
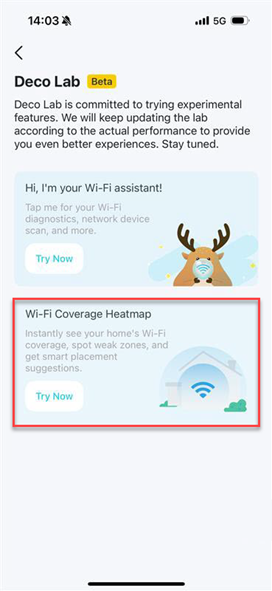
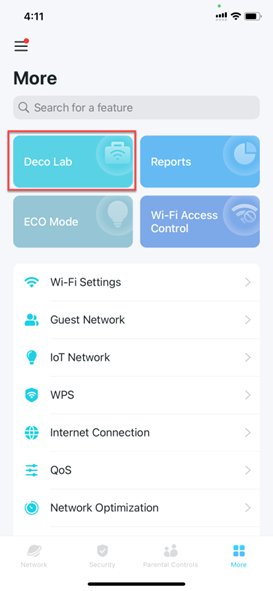
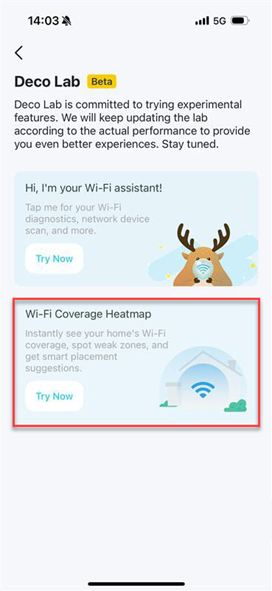
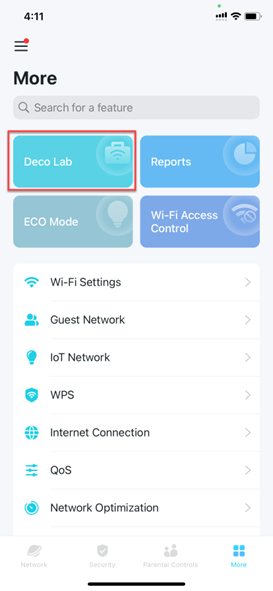
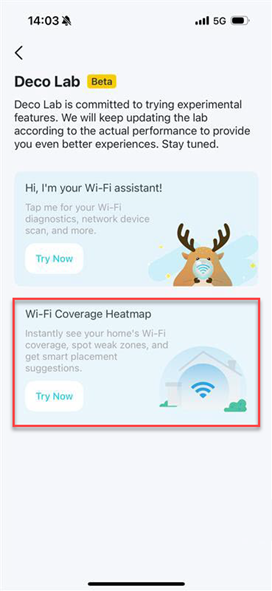
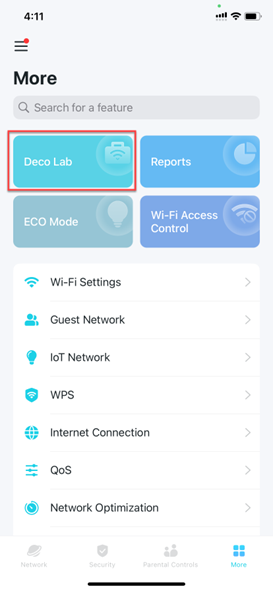
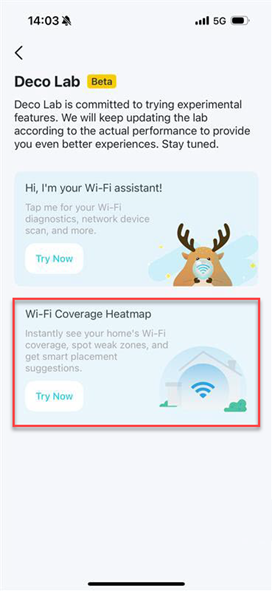
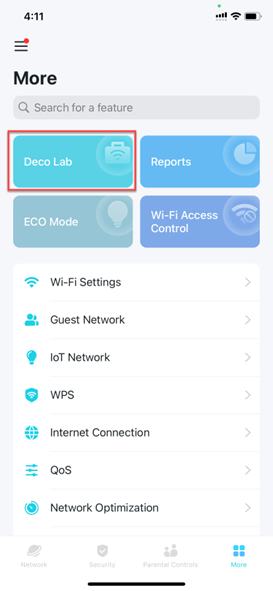
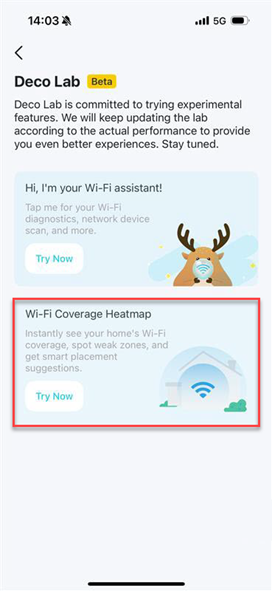
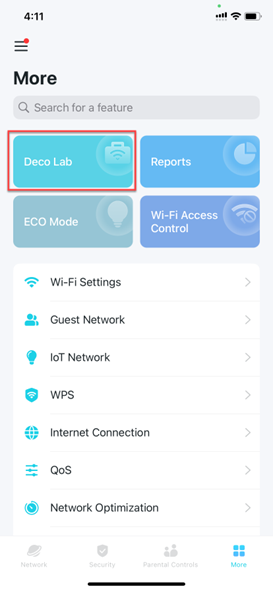
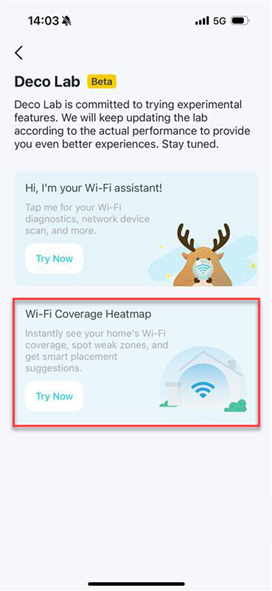
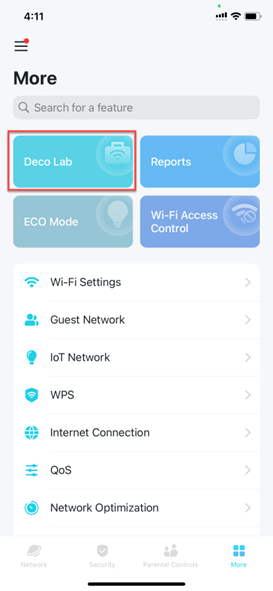
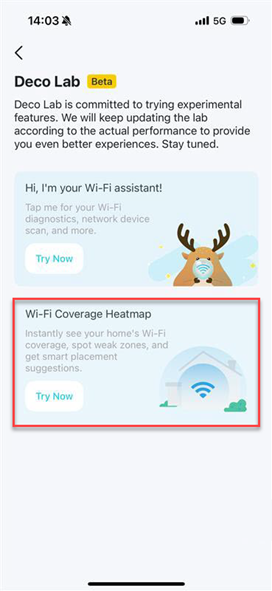
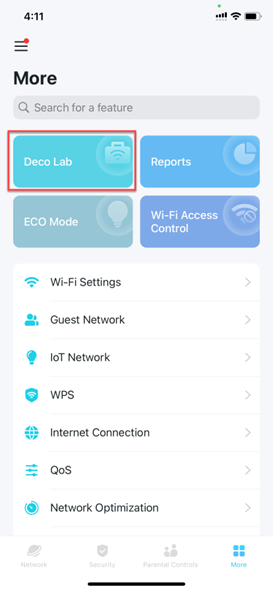
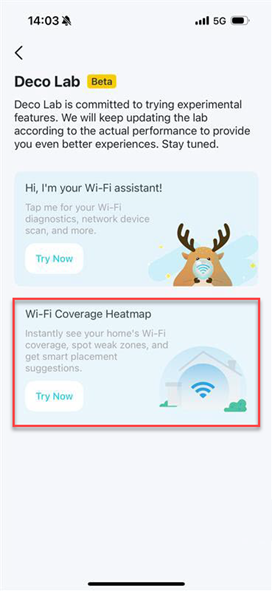
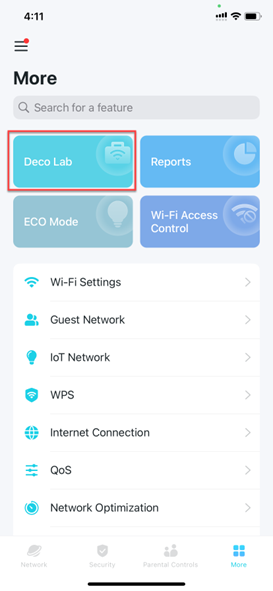
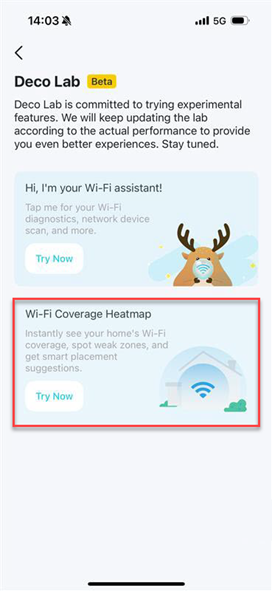
To locate the option, you may open the Deco app, go to More > Deco Lab, and select the Wi-Fi Coverage Heatmap card.
How to Create Your Whole-Home Wi-Fi Heatmap
Step 1. Open the Deco app, go to More > Deco Lab and select the Wi-Fi Coverage Heatmap card. Get started by tapping Create Floor Plan.
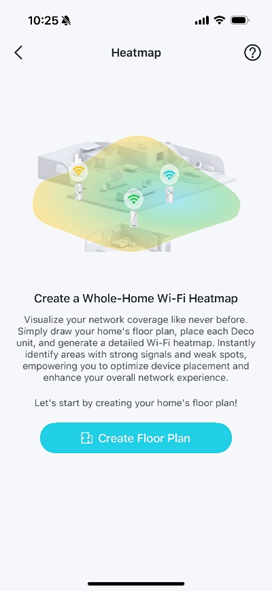
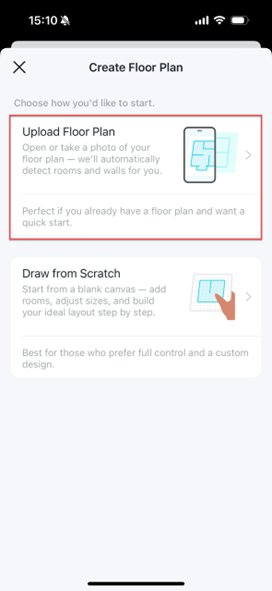
Step 2. Choose a way to start. You can either import an existing floor plan or create new ones from scratch.
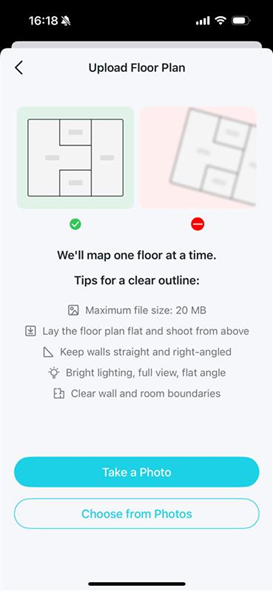
- Upload floor plan: Quickly start by uploading an existing floor plan photo.
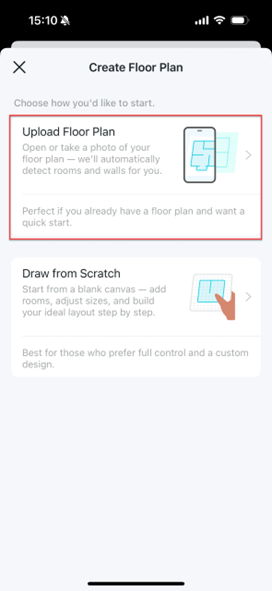
- Draw from scratch: Start from a blank canvas and build your ideal layout step by step.
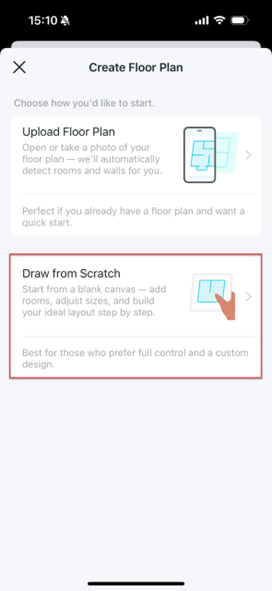
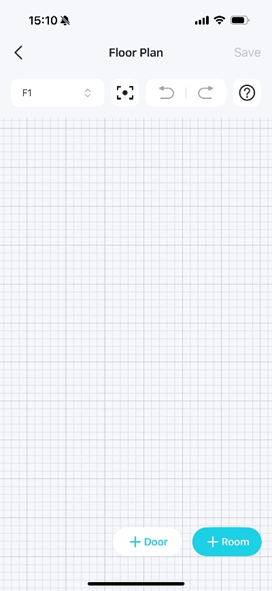
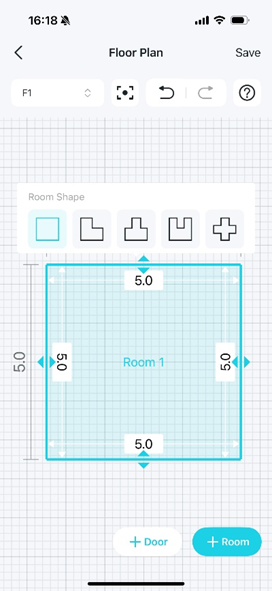
Step 3. Customize your floor plan including adding floors, rooms and doors.
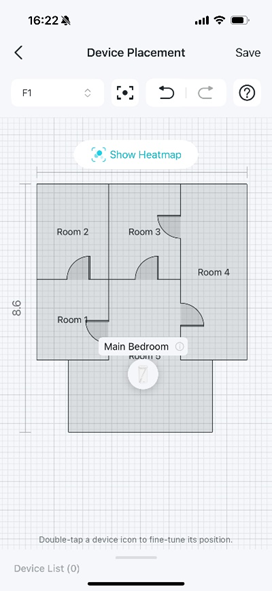
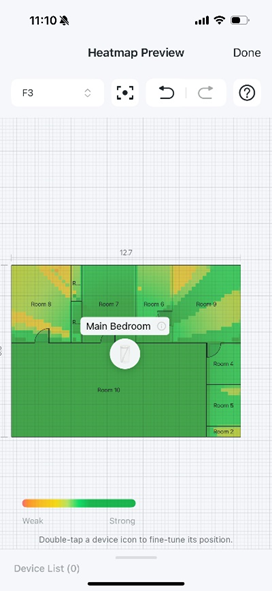
Step 4. Place your devices on the floor plan and save. Then the heatmap is created successfully. You can check the Wi-Fi signal status on the heatmap.
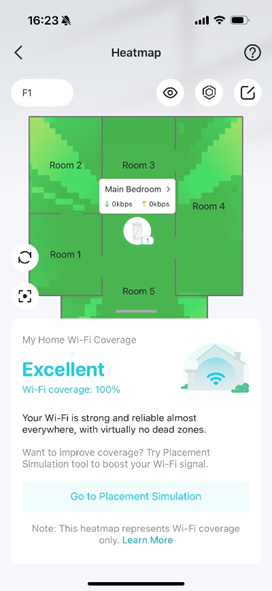
How to Read Your Wi-Fi Heatmap
Step 1. Open the Deco app, go to More > Deco Lab and select the Wi-Fi Coverage Heatmap card.
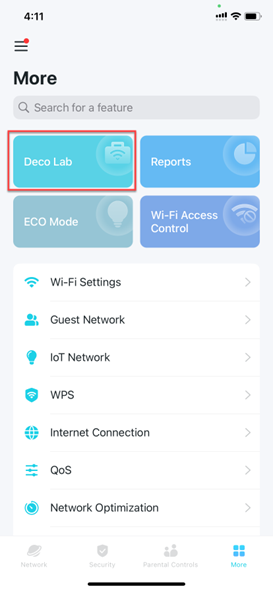
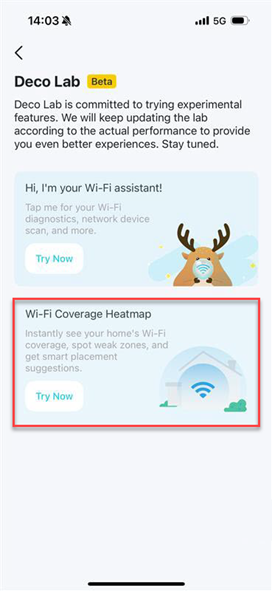
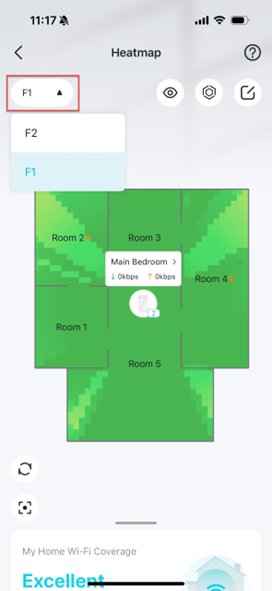
Step 2. On the heatmap, you can perform the following actions:
- Tap the floor button to switch floor views.
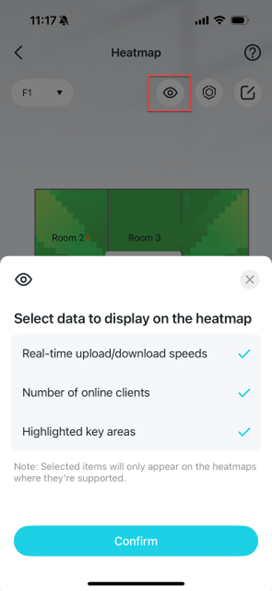
- Tap the View icon
 and select the content you want to display on the heatmap.
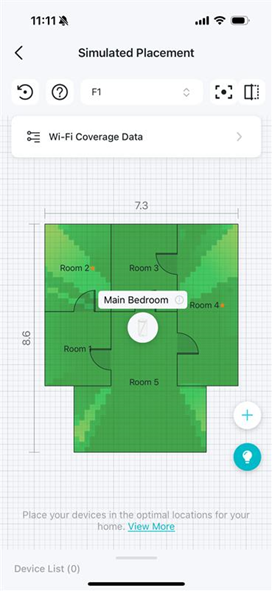
- Tap the icon
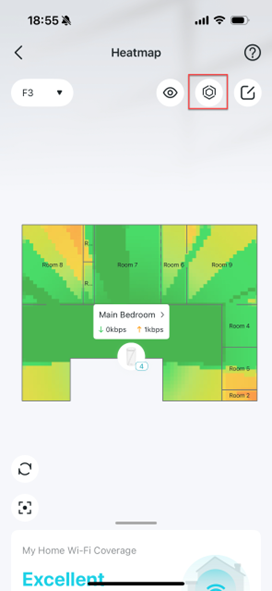
 to enter the Simulated Placement page.
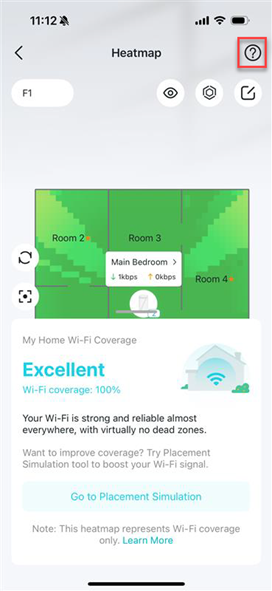
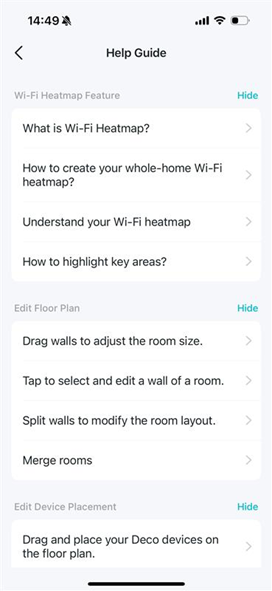
- Tap the icon
 to find the Help Guide.
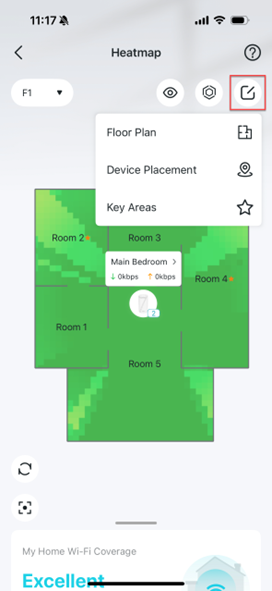
- Tap the Edit icon
 to configure the floor plan, place devices, and highlight key areas.
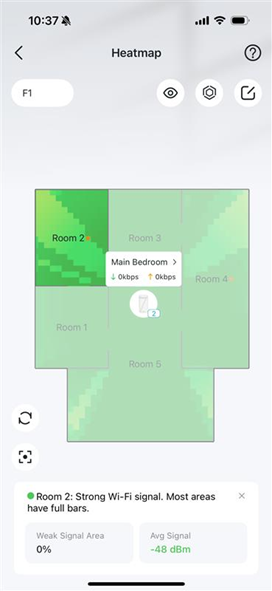
- Tap a room to check the room Wi-Fi signal status.
- Tap the icon
 to refresh the heatmap page.
 - Tap the icon
 to position the heatmap in the center of the screen.
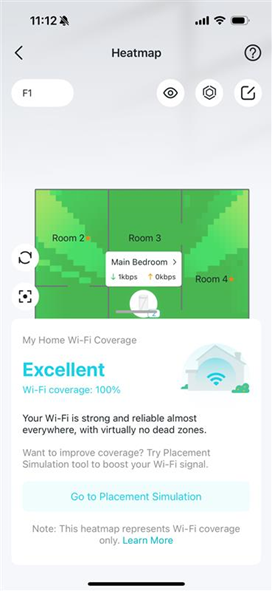
 - Slide up on the Heatmap page to check the current Wi-Fi coverage status.
How to Highlight Key Areas on Your Heatmap
Step 1. Open the Deco app, go to More > Deco Lab and select the Wi-Fi Coverage Heatmap card.
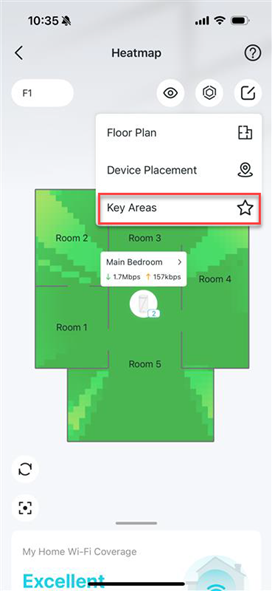
Step 2. On the heatmap, tap the Edit icon  and select Key Areas.
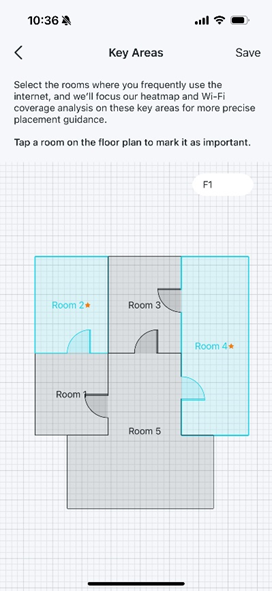
Step 3. Tap the rooms where you frequently use the internet to mark them as key areas (with a star symbol). Then the Wi-Fi coverage analysis will focus on these areas to provide more accurate placement guidance.
Generate A Floor Plan
How to Quickly Generate a Wi-Fi Heatmap from an Existing Floor Plan
Step 1. Open the Deco app, go to More > Deco Lab and select the Wi-Fi Coverage Heatmap card. Get started by tapping Create Floor Plan.
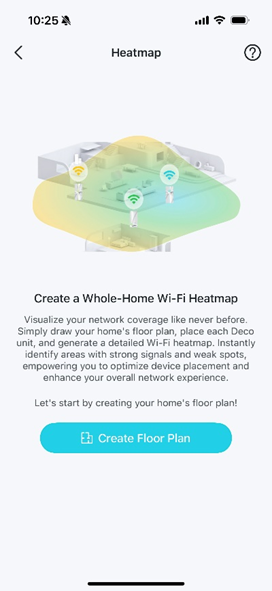
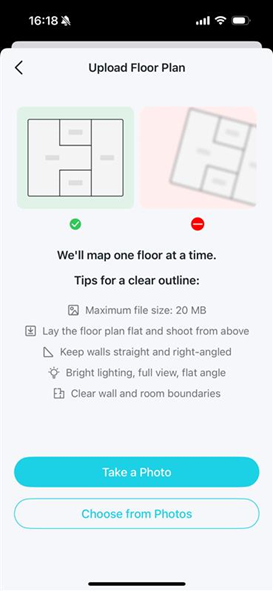
Step 2. Select Upload Floor Plan and upload an existing floor plan photo of an existing floor plan that meets the requirements. Then it’ll automatically detect and draw the floor plan based on the uploaded image.
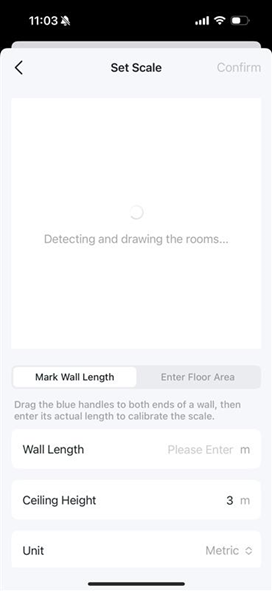
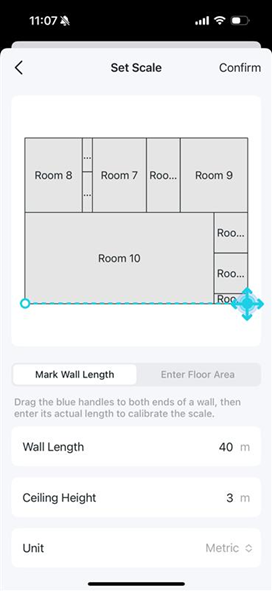
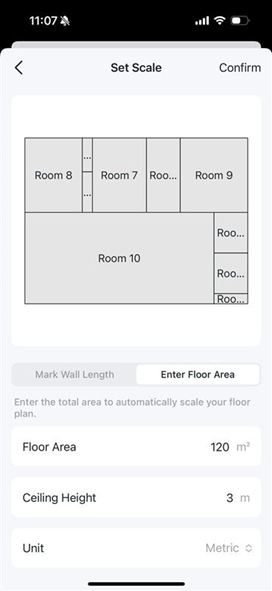
Step 3. Select the units and set the scale according to the actual situation, including wall length, ceiling height, and floor area.
Step 4. Customize your floor plan, including adding floors, rooms, and doors.
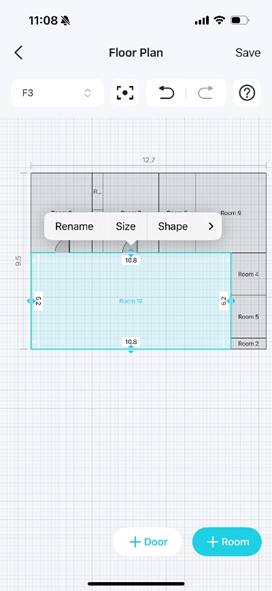
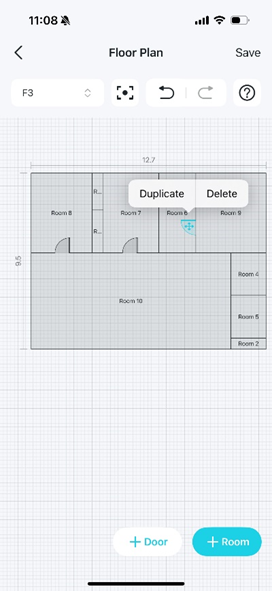
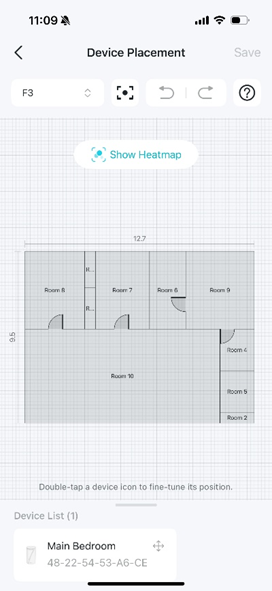
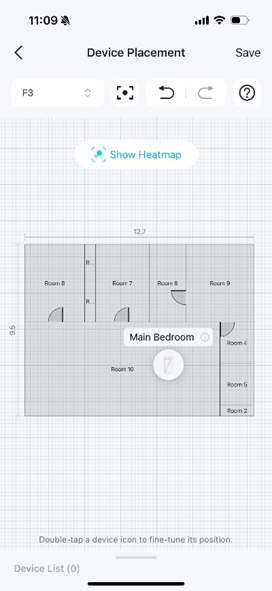
Step 5. Double-tap a device icon to place your devices on the floor plan and save. Then the heatmap is created successfully. You can check the Wi-Fi signal status on the heatmap.
How to Edit a Room On Your Floor Plan
Step 1. Open the Deco app, go to More > Deco Lab and select the Wi-Fi Coverage Heatmap card.
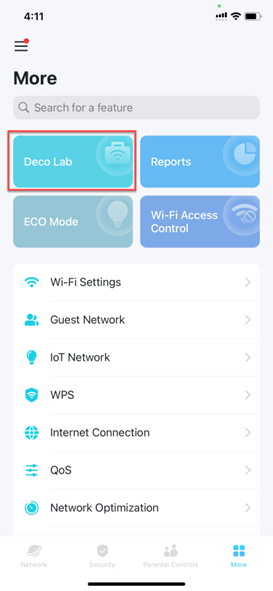
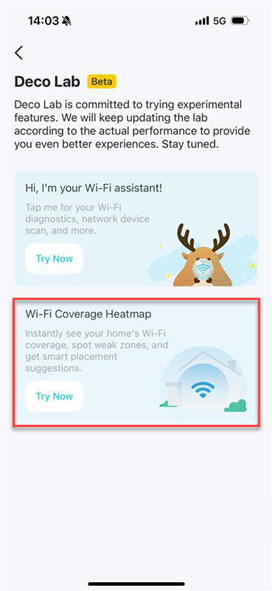
Step 2. On your heatmap, tap the Edit icon and select Floor Plan.
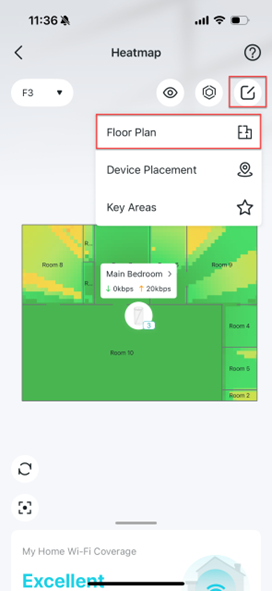
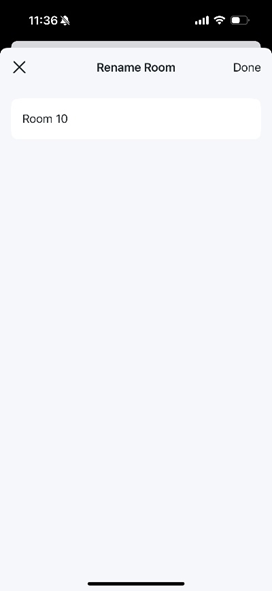
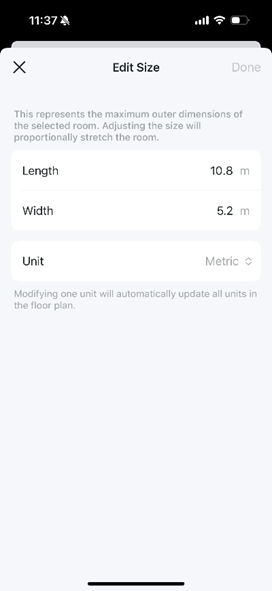
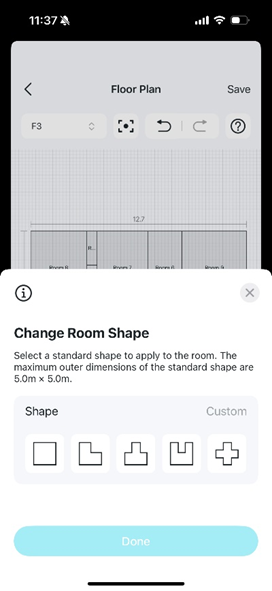
Step 3. Tap a room and you can edit the following:
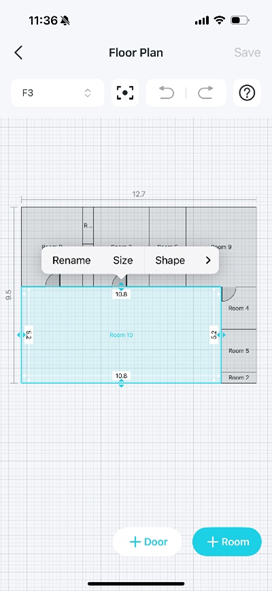
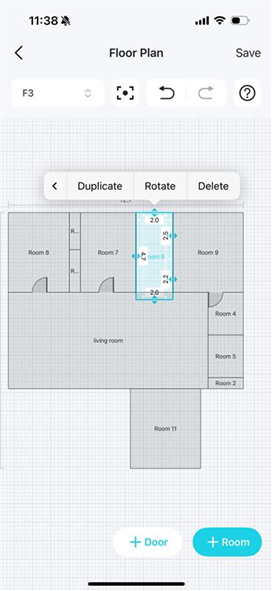
- Rename a room.
- Edit room size.
- Change room shape.
- Duplicate room.
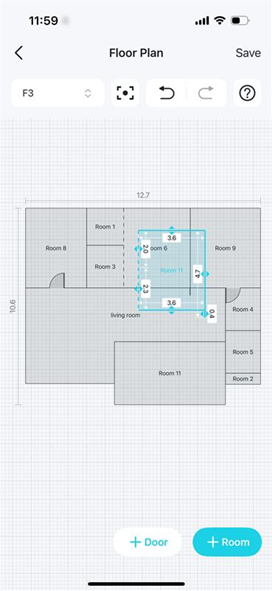
- Rotate room.
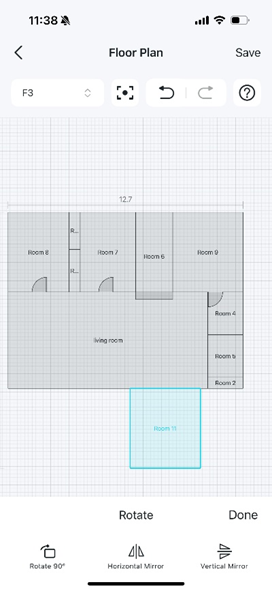
- Delete room.
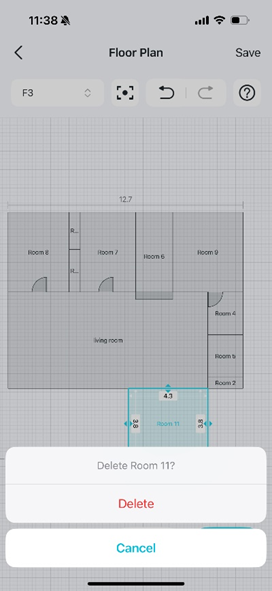
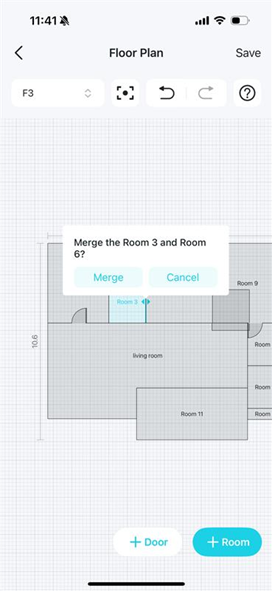
Step 4. Tap the wall between two adjacent rooms allows you to merge rooms.
How to Split a Wall On Your Floor Plan
Step 1. Open the Deco app, go to More > Deco Lab and select the Wi-Fi Coverage Heatmap card.
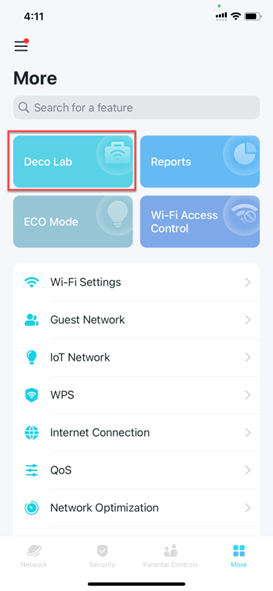
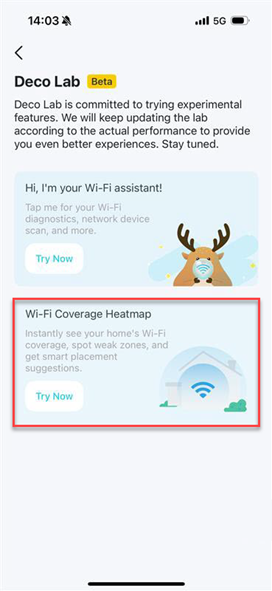
Step 2. On your heatmap, tap the Edit icon  and select Floor Plan.
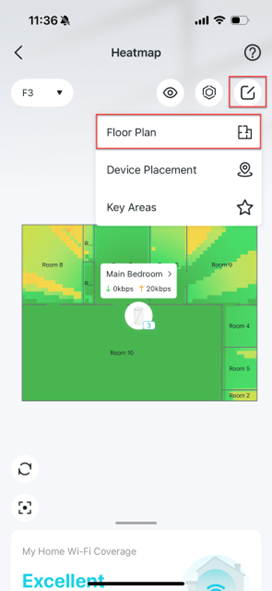
Step 3. Tap a wall of a room and tap Split.
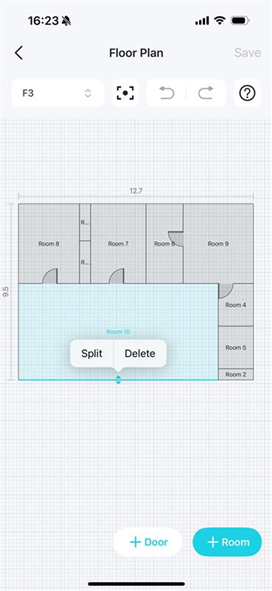
Step 4. Drag the handle or enter a value to set the wall length and tap Done.
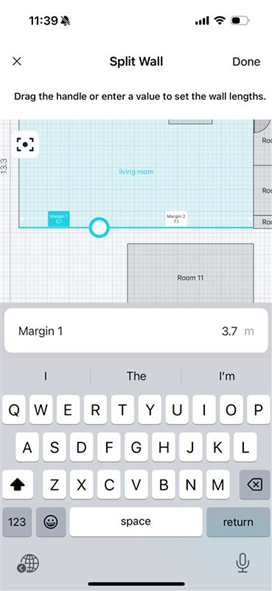
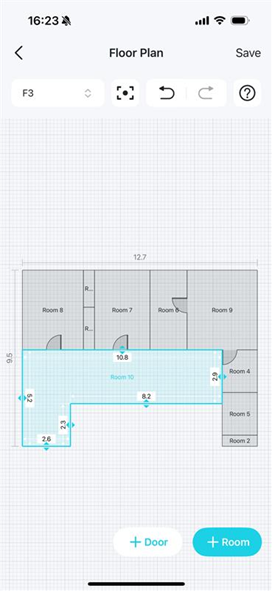
Step 5. Then you can set the two walls separately.
How to Merge Rooms On Your Floor Plan
Step 1. Open the Deco app, go to More > Deco Lab and select the Wi-Fi Coverage Heatmap card.
Step 2. On your heatmap, tap the Edit icon  and select Floor Plan.
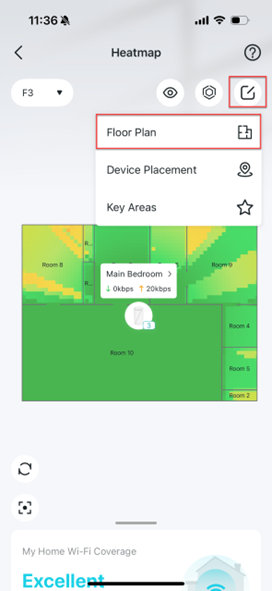
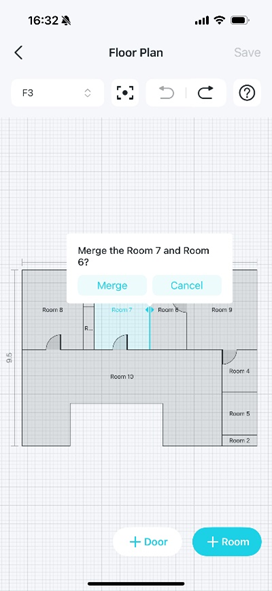
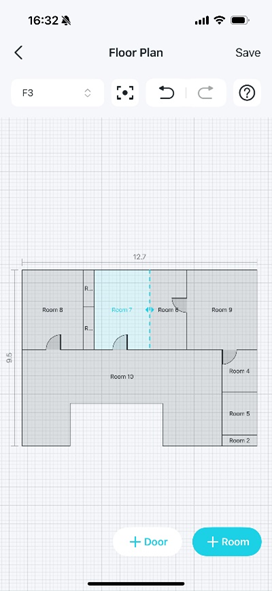
Step 3. Tap the wall between two adjacent rooms and select Merge. Then the solid line between the two rooms will turn into a dashed line, indicating that the rooms are merged successfully.
Device Placement
How to Place Devices Accurately On a Heatmap
Step 1. Open the Deco app, go to More > Deco Lab, and select the Wi-Fi Coverage Heatmap card.
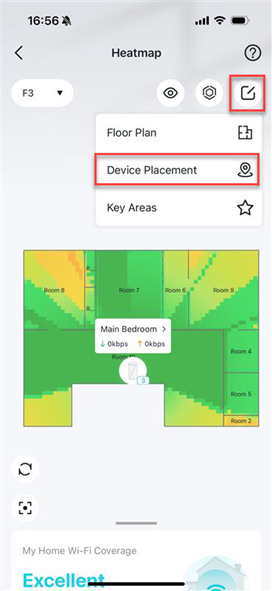
Step 2. On the heatmap, tap the Edit icon  and select Device Placement.
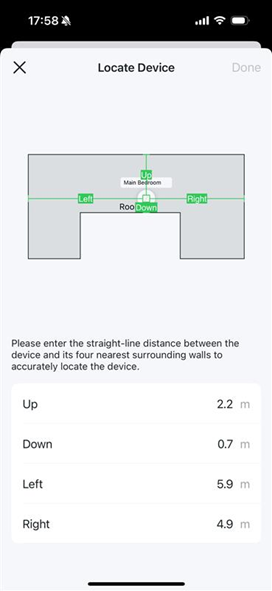
Step 3. Double tap the device icon to locate the device accurately by entering the straight-line distance between the device and its four nearest surrounding walls. Then tap Done and save the settings.
How to Preview Your Wi-Fi Heatmap
Step 1. Open the Deco app, go to More > Deco Lab, and select the Wi-Fi Coverage Heatmap card.
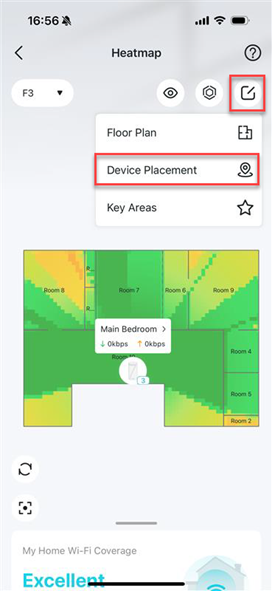
Step 2. On the heatmap, tap the Edit icon  and select Device Placement.
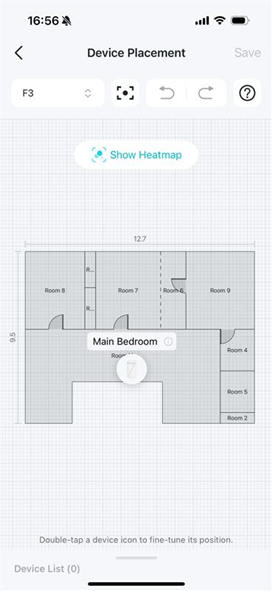
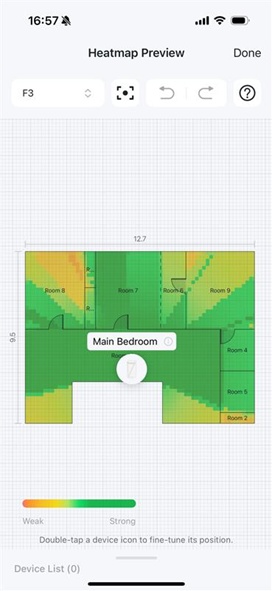
Step 3. Tap Show Heatmap to preview the current heatmap. Then you can adjust the device position according to the real-time heatmap status.
Placement Simulation
What is Placement Simulation
Step 1. Open the Deco app, go to More > Deco Lab, and select the Wi-Fi Coverage Heatmap card.
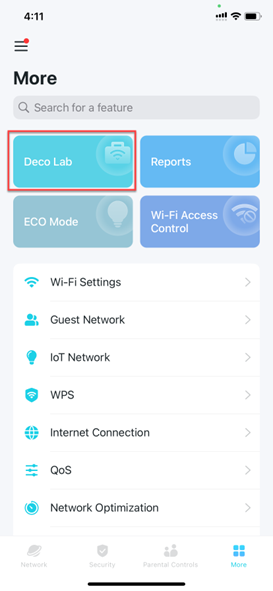
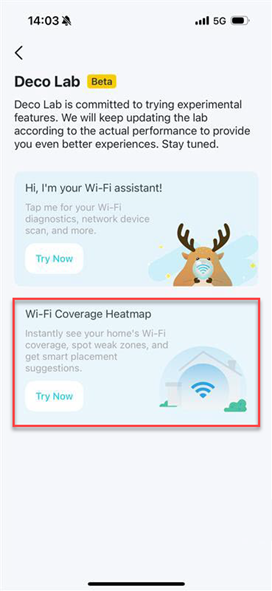
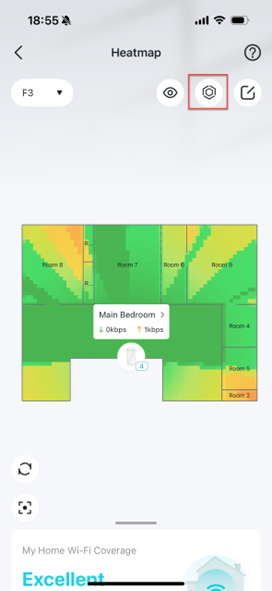
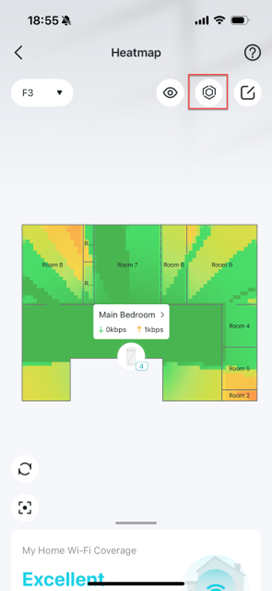
Step 2. On the heatmap, tap the icon  to enter the Simulated Placement page.
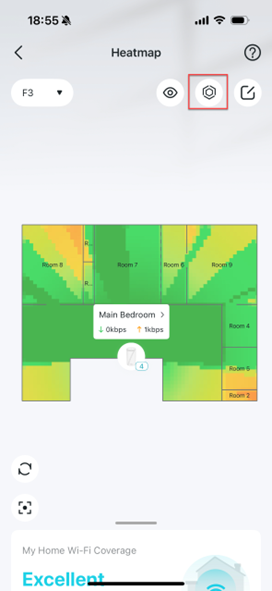
Step 3. On the Simulated Placement page, you can perform the followings:
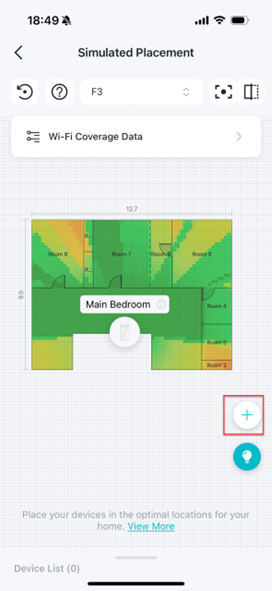
- Add Virtual Devices: Tap the Add icon and then a virtual device will appear on the heatmap. You can move the virtual device to observe changes in the heatmap and then choose the optimal location for that device.
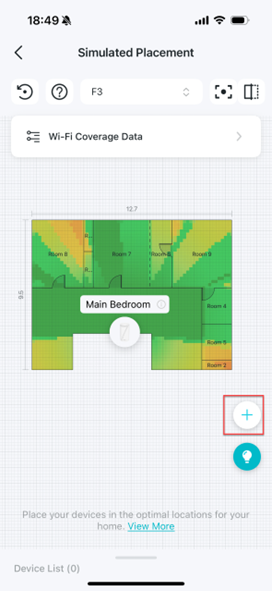
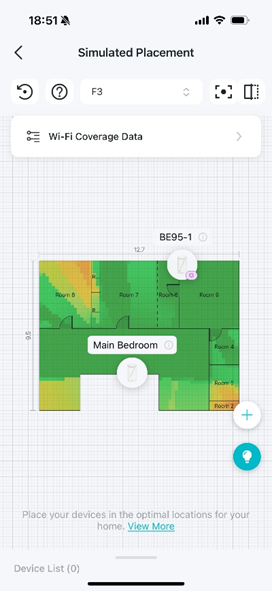
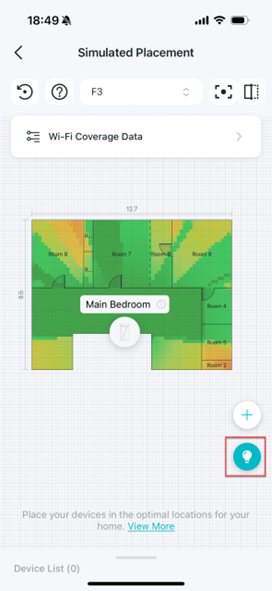
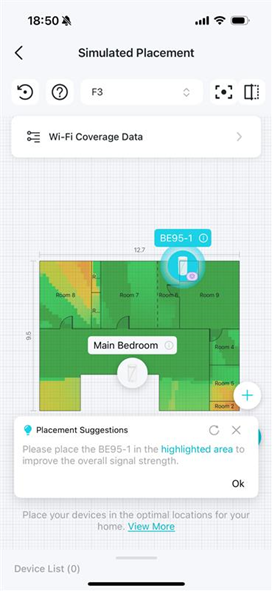
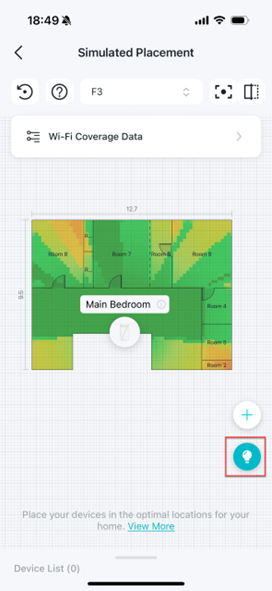
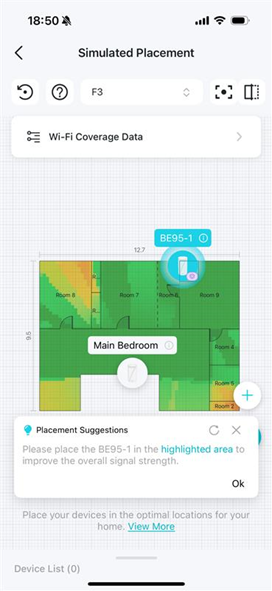
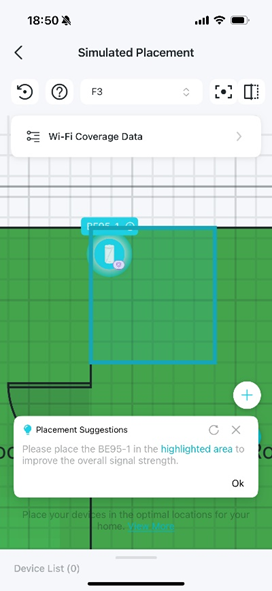
- View placement suggestions: Tap the Bulb icon to view the placement suggestions for this floor. Tap the device icon to view the suggestions for the device. Then you can adjust the device placement accordingly.
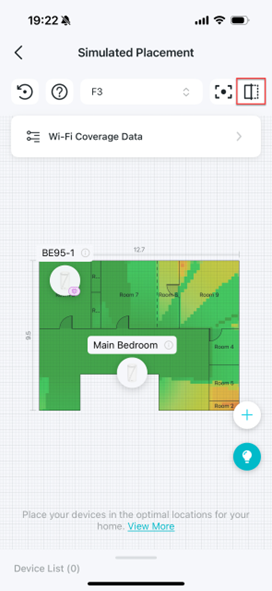
- Check Comparative heatmaps: Press and hold the icon
 to display the actual Wi-Fi coverage of the current network.
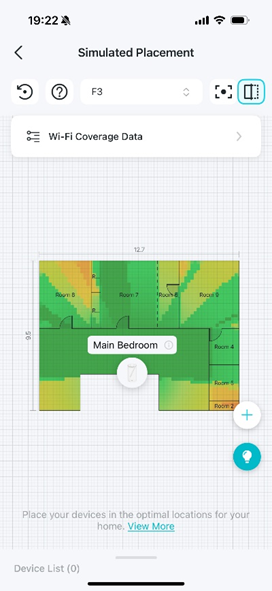
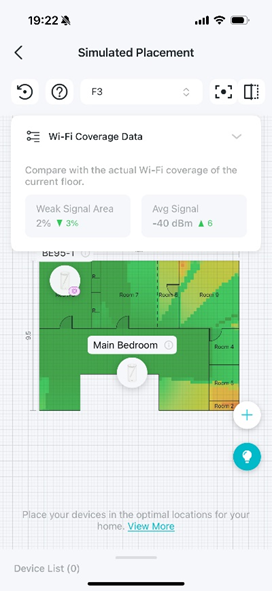
- Check Comparative Statistics: Tap Wi-Fi Coverage Data to display the comparison data about the actual Wi-Fi coverage for the current floor.
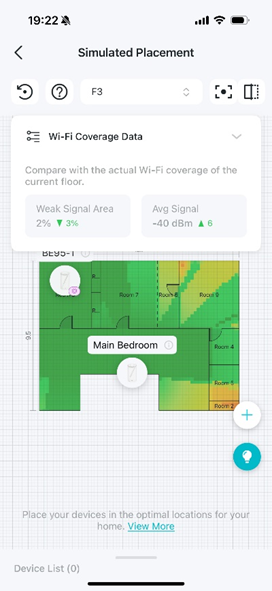
How to Optimize Device Placement with Heatmap Suggestions
Step 1. Open the Deco app, go to More > Deco Lab, and select the Wi-Fi Coverage Heatmap card.
Step 2. On the heatmap, tap the icon  to enter the Simulated Placement page.
Step 3. Tap the Bulb icon to view the placement suggestions. Tap the device icon to view the suggestions for the device. Then tap the highlighted area to adjust your device.
How to Add a Virtual Device for Simulation On a Heatmap
Step 1. Open the Deco app, go to More > Deco Lab, and select the Wi-Fi Coverage Heatmap card.
Step 2. On the heatmap, tap the icon  to enter the Simulated Placement page.
Step 3. Tap the Add icon and then a virtual device will appear on the heatmap.
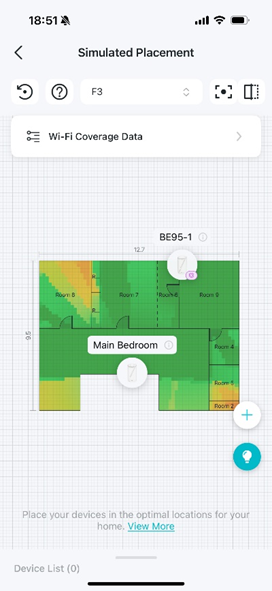
Step 4. You can perform the following actions for the virtual device:
- Tap the virtual device to view the placement suggestions.
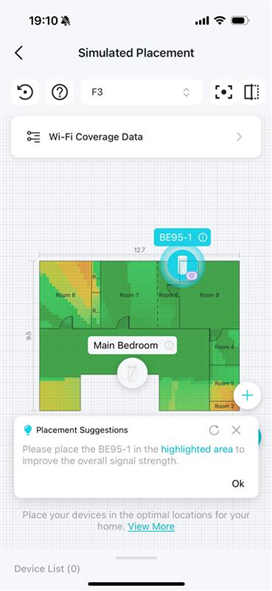
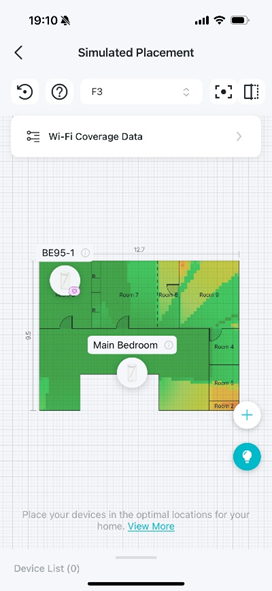
- Tap and hold the device to move it according to the heatmap.
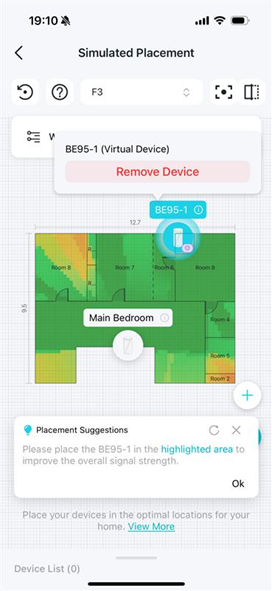
- Tap the icon
 to remove the virtual device.
How to Compare Simulated Data with Your Actual Network Data On a Heatmap
Step 1. Open the Deco app, go to More > Deco Lab, and select the Wi-Fi Coverage Heatmap card.
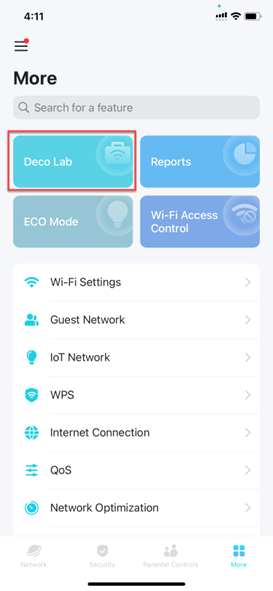
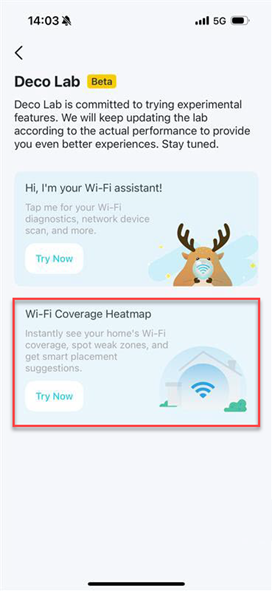
Step 2. On the heatmap, tap the icon  to enter the Simulated Placement page.
Step 3. Press and hold the icon  to display the actual Wi-Fi coverage of the current network.
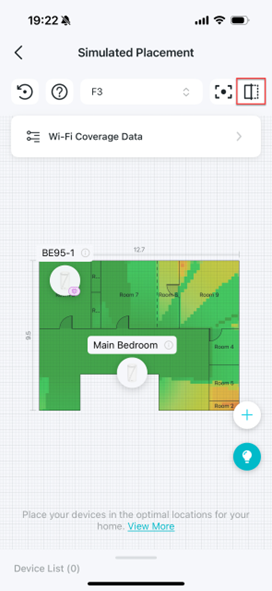
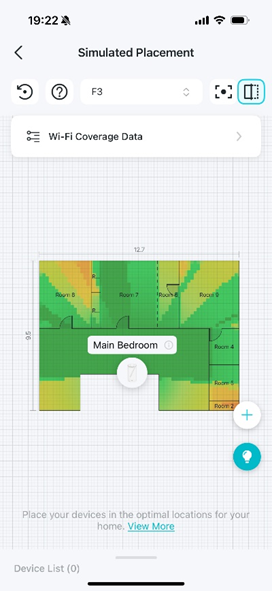
Step 4. Tap Wi-Fi Coverage Data to display the comparison data about the actual Wi-Fi coverage for the current floor.
Signal Test
Which Devices are Compatible with the Signal Test Feature
Our signal testing heatmap feature is now verified and supported on several mainstream device models, including the iPhone 13 mini, Samsung Galaxy S23 Ultra, and Google Pixel 9 Pro XL.
Note: In certain scenarios, the heatmap’s practical measurement function may become unavailable. This can occur when using newer versions of iOS devices and operating systems, or when encountering autonomous roaming stations that do not respond to the 11k requests from the Access Point side.
Why Signal Test Is Important for Accurate Heatmaps
Although we can generate our home Wi-Fi heatmap with uploaded floor plans and predictive simulations, real-world signal performance is influenced by numerous environmental variables. On-site signal testing is important for capturing actual signal behavior and ensuring the accuracy and reliablity of the final heatmap.
Physical obstructions such as concrete walls, metal frames, or thick brick can significantly weaken Wi-Fi signals in ways simulations may not fully account for. Conducting a physical walk-test measures the true impact of these materials, providing data that may differ from the simulation settings. Signal test turns a predictive model into a validated, actionable heatmap—giving you confidence that your Wi-Fi design will perform as expected in the actual environment.
By testing on site, weak or dead zones can be precisely identified. This allows for informed, targeted adjustments to our device placement—reducing overlap, eliminating coverage gaps, and ultimately optimizing network performance.
How to Run a Signal Test On a Heatmap
Step 1. Open the Deco app, go to More > Deco Lab, and select the Wi-Fi Coverage Heatmap card.
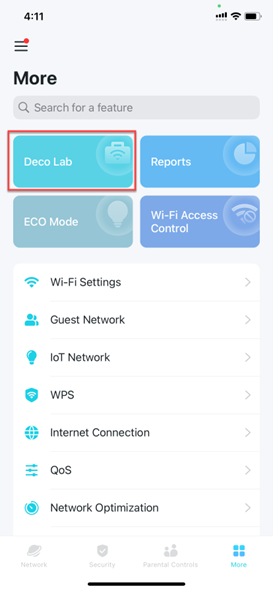
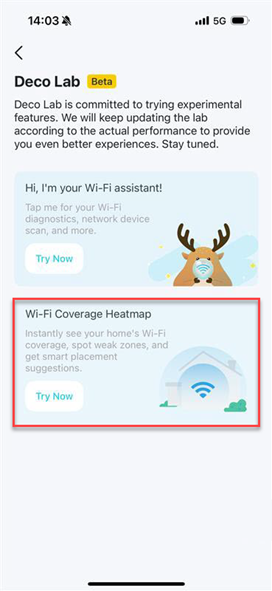
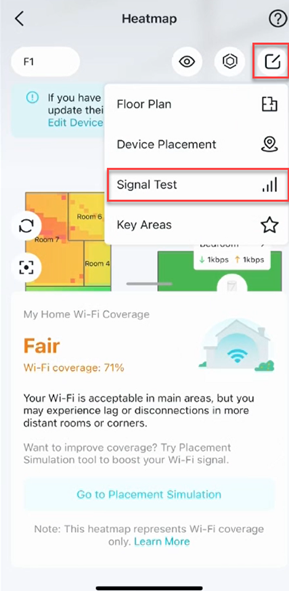
Step 2. On the heatmap, tap the Edit icon  and select Signal Test.
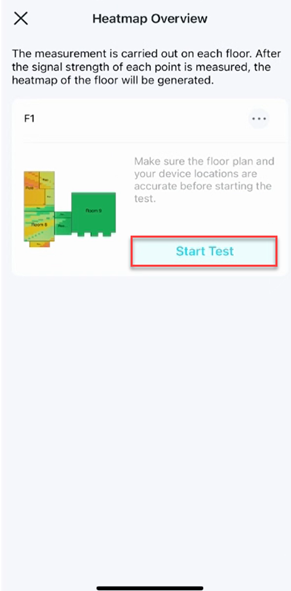
Step 3. Ensure your floor plan and device placements are accurate, then tap Start Test.
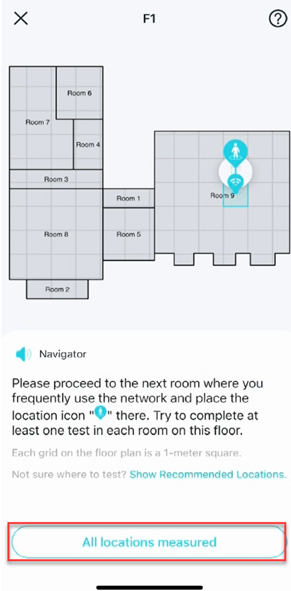
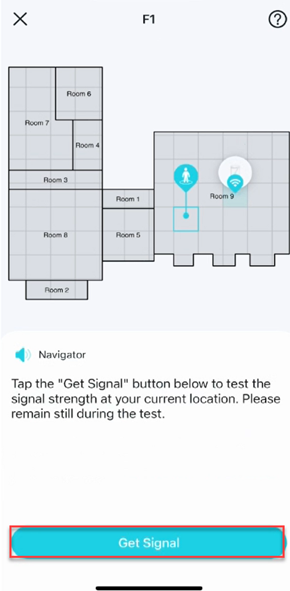
Step 4. Go to areas where you frequently use the network and place the location icon to your current position. Then tap Get Signal to run the test for this location. Please stay still during the test.
Note: If you're unsure where to test, tap 'Show Recommended Locations' for more suggestions.
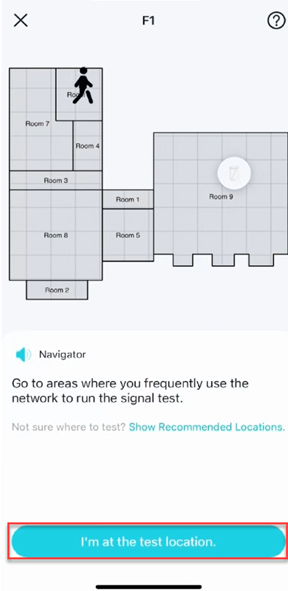
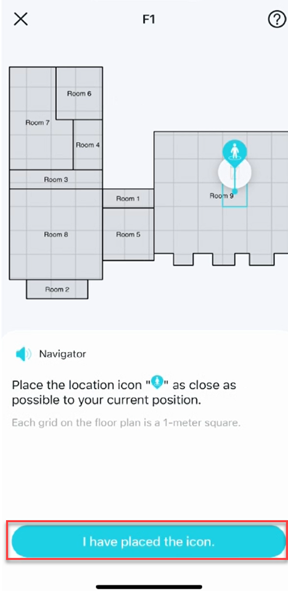
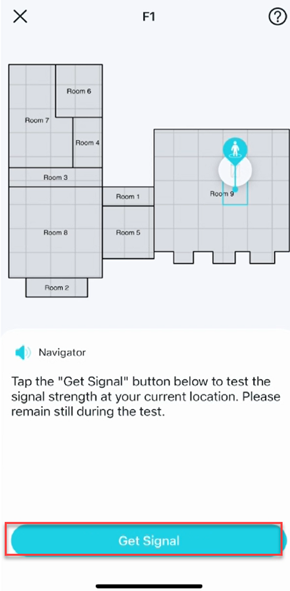
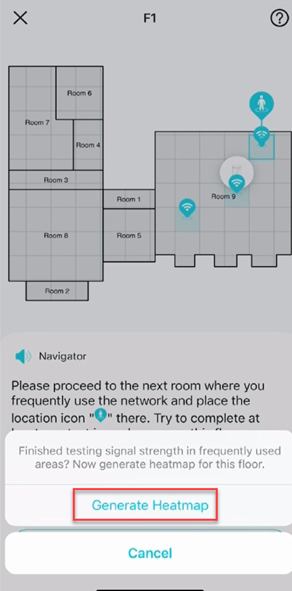
Step 5. Move to other rooms and run the signal test following the same steps above. After completing all tests on each floor, generate a heat map.
Get to know more details of each function and configuration please go to Download Center to download the manual of your product.
Looking For More
Полезен ли беше този ЧЗВ?
Вашите отзиви помагат за подобряване на този сайт.
_Overview_normal_20230724014922u.png)

_EU_V1.0_01_normal_20220817025337r.jpg)

TP-Link Community
Still need help? Search for answers, ask questions, and get help from TP-Link experts and other users around the world.