How to Configure Your TP-Link Range Extender to Access Point Mode
Some TP-Link Range Extenders can work as Access Points, transforming an existing wired network into a wireless network.
Before starting configuration, please note the following prerequisites:
- Only Range Extenders with an Ethernet port support Access Point Mode.
- Access Point Mode is not available on some Range Extender models. Please confirm your device supports this feature before proceeding.
This guide introduces two configuration methods separated by the operation channel:
Part 1: Configuration via Tether App
Step 1. Log in to your Range extender via the Tether App.
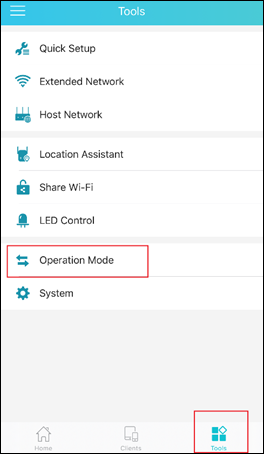
Step 2. Go to “Tools > Operation Mode”.
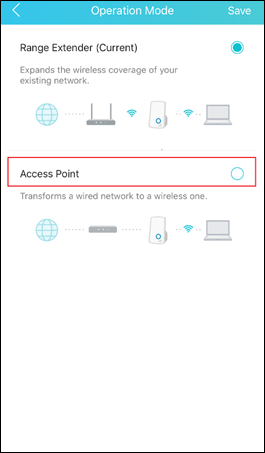
Step 3. Select “Access Point” and save.
Step 4. Connect the Range Extender to your router via Ethernet Cable.
Step 5. Log in to your Range Extender again via the Tether app. You may change the wireless settings on the Range Extender, such as Wi-Fi Name and password. (Optional)
Part 2: Configuration via Web Management Interface
Step 1. Log in to the web management page of the range extender. If you don’t know how to do that, please refer to How to log in to the web management page of the range extender?
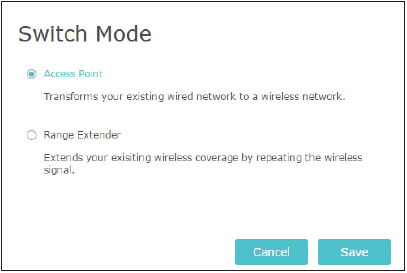
Step 2. Click Mode in the top right corner of the page. Select Access Point and click Save. The extender will reboot and switch to Access Point mode.
Step 3. After rebooting, connect the extender to your modem or wired router via an Ethernet cable.
Step 4. Visit http://tplinkrepeater.net, and log in with the username and password you set for the extender.
Note: Ensure your device is connected to the extender’s Wi-Fi. (Default Wi-Fi name is TP-Link Extender)
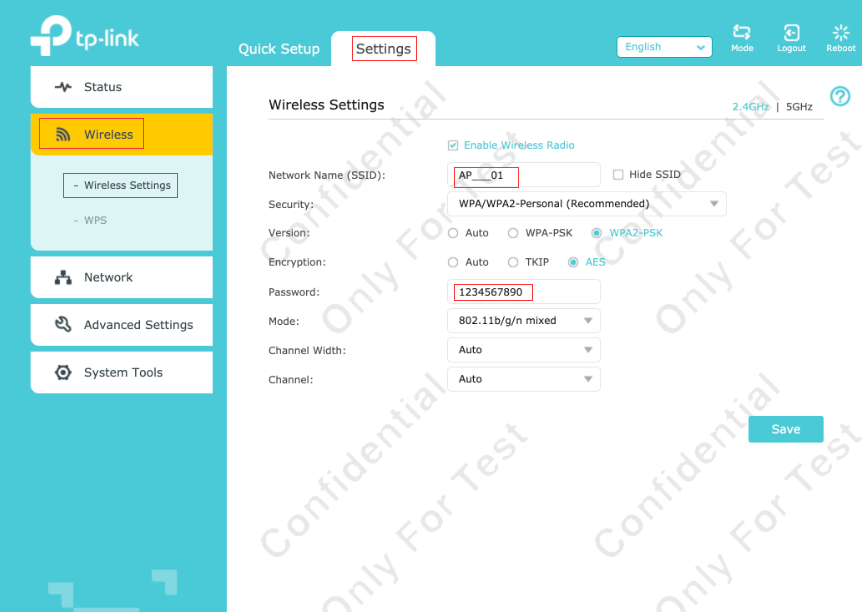
Step 5. Go to Settings > Wireless > Wireless Settings, then you can change the Wi-Fi name and password.
To get more details of each function and configuration, please go to the TP-Link Download Center to download the official manual of your product.