


How to Add Bluetooth to Your Windows PC Using a TP-Link PCIe WLAN Adapter
If your Windows desktop PC doesn't have built-in Bluetooth, a TP-Link WLAN Bluetooth adapter is a straightforward way to add it — letting you connect headphones, transfer files, or pair other Bluetooth devices. The adapter installs in a PCIe X1 slot on your motherboard. This guide covers 4 steps: installing the adapter, installing the Bluetooth driver, pairing a Bluetooth device, and sending or receiving files. Demonstration uses the Archer TX3000E (UN) 1.0.
Key Takeaways
- A TP-Link WLAN Bluetooth adapter can add Bluetooth to a desktop PC that does not have it built in.
- The adapter connects via a PCIe X1 slot, with a Bluetooth USB cable connected to the motherboard's F_USB connector. Bluetooth will not work if this cable is not connected correctly.
- The Bluetooth driver must be installed separately from the Wi-Fi driver — do not install both at the same time.
- After driver installation, Bluetooth devices can be paired via the Bluetooth icon in the menu bar or through Start > Settings > Devices > Bluetooth & other devices.
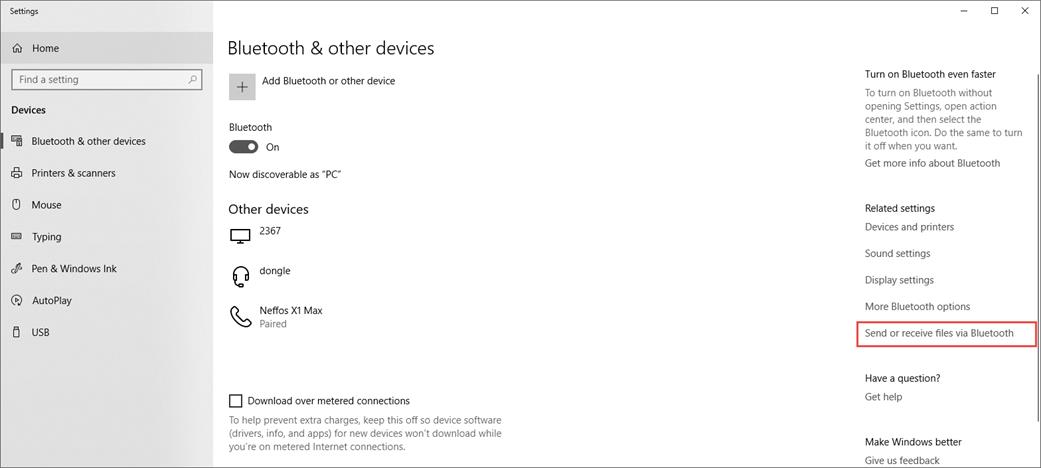
- Files can be sent or received via Bluetooth using the Send or receive files via Bluetooth option in Windows Bluetooth settings.
How to Add Bluetooth to Your PC
Step 1: Connect the Adapter to Your Computer
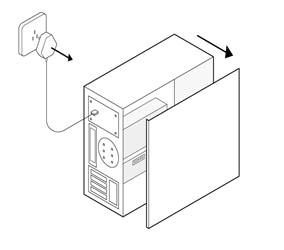
1. Turn off your computer, unplug the power cable, then remove the case panel.
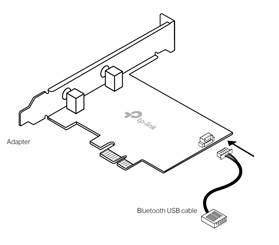
2. Connect the provided Bluetooth USB cable to the adapter.
3. Locate an available PCIE X1 slot and carefully insert the adapter.
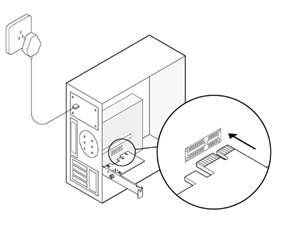
Note: If the bracket is not compatible with your computer, detach it from the adapter board and replace it with the low-profile bracket.
4. Locate an available F_USB connector and carefully plug the Bluetooth USB cable into it.
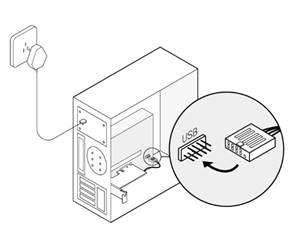
Note: If the Bluetooth USB cable is not correctly connected to the motherboard, Bluetooth will not work even after the driver is installed.
5. Replace the case panel, plug in the power cable, and turn on your computer.
Step 2: Install the Bluetooth Driver
Note: The following steps take Windows 10 (64-bit) as an example. The actual interface images may vary by model and software version.
1. Insert the CD and run the Autorun.exe.
Note: You can also check the new release and download the driver at https://www.tp-link.com/support/download/
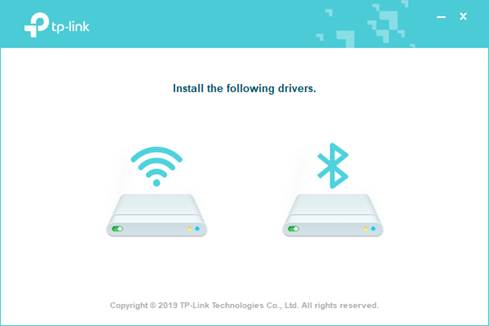
2. Click  to start Bluetooth driver installation, then follow the on-screen instructions to finish it.
Note: Do not install the Bluetooth and Wi-Fi drivers at the same time. Wait until the Wi-Fi driver installation is complete before installing the Bluetooth driver.
3. To check if your Bluetooth driver is well installed, refer to How to check if I have installed the driver for my adapter successfully or not on Windows. Alternatively, check if the Bluetooth icon is displayed in the menu bar.
Step 3: Pair with Your Bluetooth Device
1. Turn on your Bluetooth device and make it discoverable.
2. After the Bluetooth driver installation, you will find a Bluetooth icon displayed in the menu bar. Right-click it and select Add a Bluetooth Device or Add a Device to scan for available devices.
Note: You can also go to Start > Settings > Devices > Bluetooth & other devices to access Bluetooth settings on Windows 10.
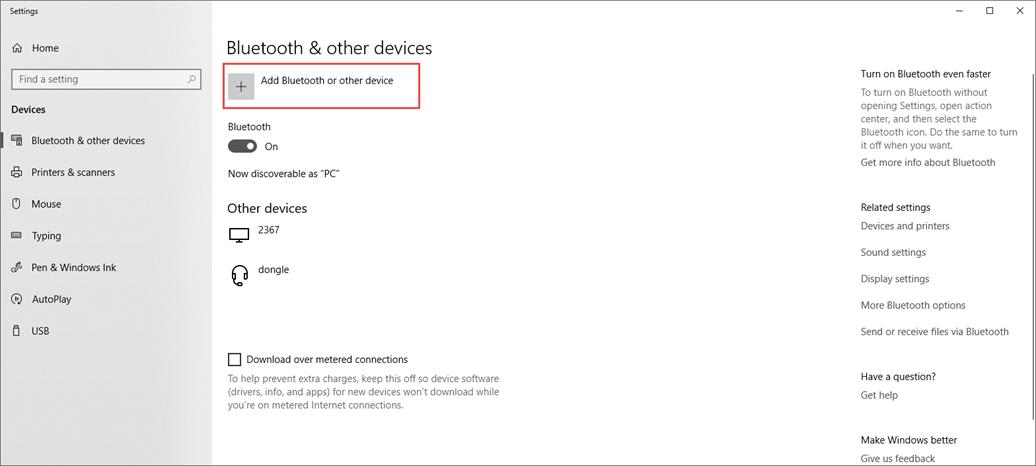
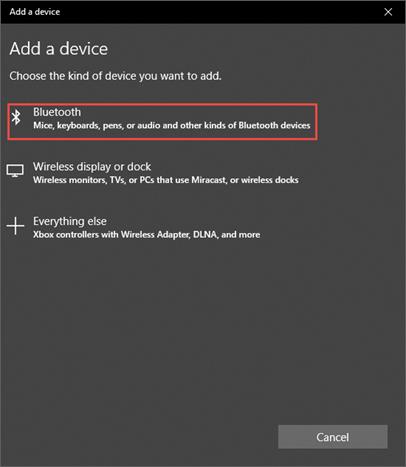
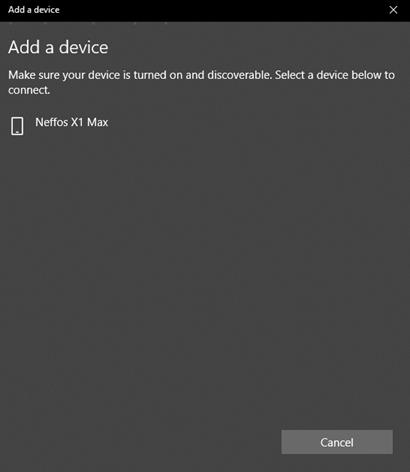
3. Select your Bluetooth device from the scanned list and follow additional instructions to complete pairing.
Step 4: Send or Receive Files via Bluetooth
1. Select Send or receive files via Bluetooth in your computer’s Bluetooth settings.
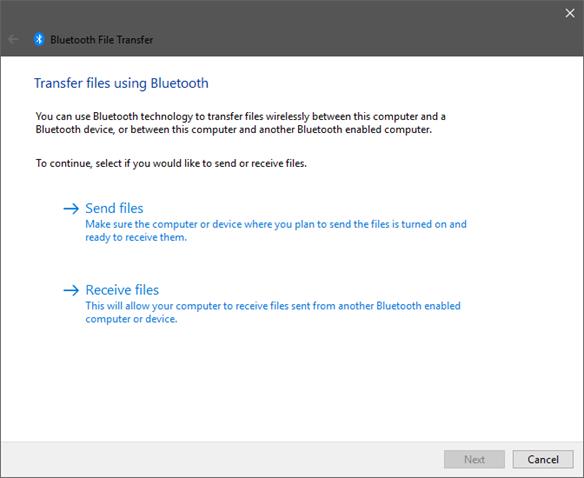
2. Select if you would like to send or receive files to continue. Then follow the on-screen instructions to transmit files.
For more details, download the manual for your product from the Download Center.
Looking For More
Is this faq useful?
Your feedback helps improve this site.

TP-Link Community
Still need help? Search for answers, ask questions, and get help from TP-Link experts and other users around the world.