


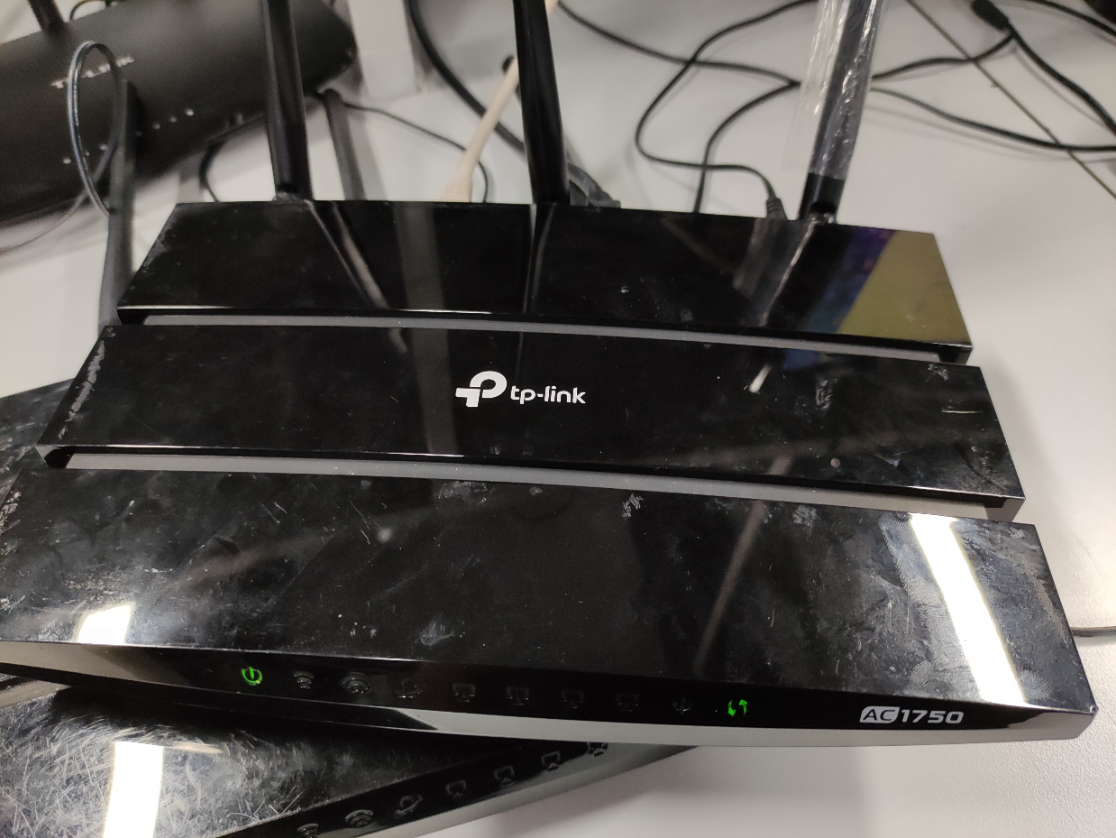
How to Recover a Bricked TP-Link Router
A TP-Link router that has been bricked is one that has become unresponsive, most often because it lost power during a firmware upgrade. This page covers two recovery methods: Method 1 applies to most TP-Link routers, and Method 2 applies to Archer AX series routers. Not all models support firmware recovery.
Note: Most TP-Link routers support firmware recovery, but some older models do not. If recovery fails, your device may not support this process. Please contact TP-Link Technical Support for further assistance.
Key Takeaways
- A TP-Link router typically becomes unresponsive after losing power during a firmware upgrade. The Power and WPS LEDs will remain solid on, or the power light will blink rapidly, depending on the model.
- Method 1 applies to most TP-Link routers. You will download the latest firmware from the TP-Link Download Center, connect a computer to the router via Ethernet, and upload the firmware at 192.168.0.1.
- Method 2 applies to Archer AX series routers. You will enter rescue mode by holding the WPS or Reset button while powering on, then upload firmware from a computer set to a static IP address.
- Always download firmware from the TP-Link official website for the country where the device was purchased. Using firmware from a different regional site may cause upgrade failure and affect the warranty.
- Do not power off the router during the firmware upload. This is the most common cause of a bricked router.
- After recovery, reset your computer's Internet Protocol (IP) address back to automatic before continuing with router setup.
Method 1: Recover Most TP-Link Routers
How to Tell if Your Router Has Been Bricked
Two light patterns indicate a bricked router:
- Both the power light and the WPS light are solid on when you power on the router, and a wired PC can detect the connection. (e.g., Archer A7 V5)
- The power light blinks rapidly while other lights remain on normally. (e.g., Archer C80 v1)

The Procedure to Do a Recovery
Step 1: Download the Latest Firmware for Your Router Model
Download the latest firmware from the TP-Link Download Center, where you can search by model number. The file will be compressed, so use an unzip tool such as WinZip or WinRAR to extract the firmware file before continuing.
Step 2: Connect Your PC to the Router via Ethernet
Connect your PC to one of the router's LAN (yellow) ports using an Ethernet cable. Confirm that power and link indicators are showing on the router.
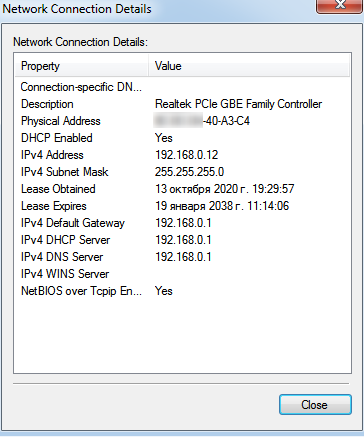
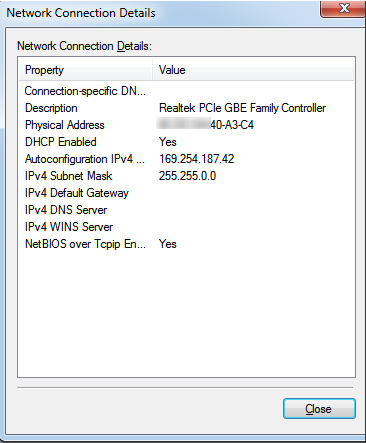
Step 3: Check Your PC's IP Address and Assign a Static IP if Needed
To check your current IP address, see how to find IP address on your devices.
Case 1 applies when the router has already assigned your computer an IP address via Dynamic Host Configuration Protocol (DHCP). Case 2 applies when it has not, and your computer has assigned itself an IP address instead.
Case 1: If the IP address is 192.168.0.XX, proceed directly to Step 4.
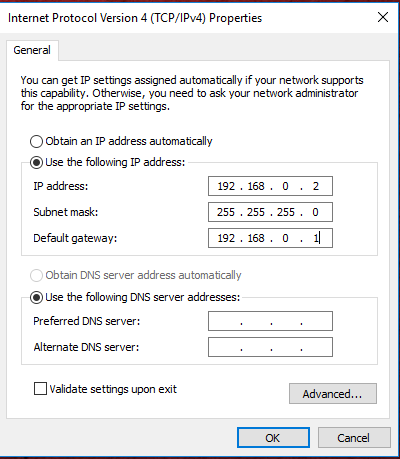
Case 2: If your computer shows a self-assigned IP address outside the router's network range, manually assign a static IP address as shown below.
Set up a static IP like the example below.
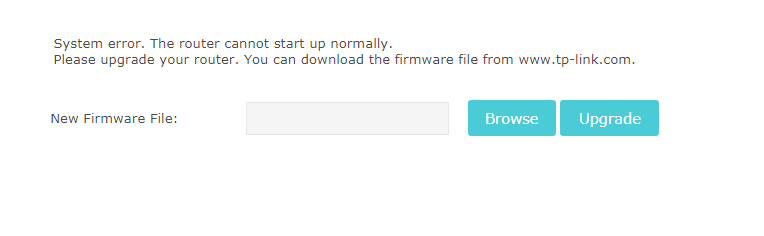
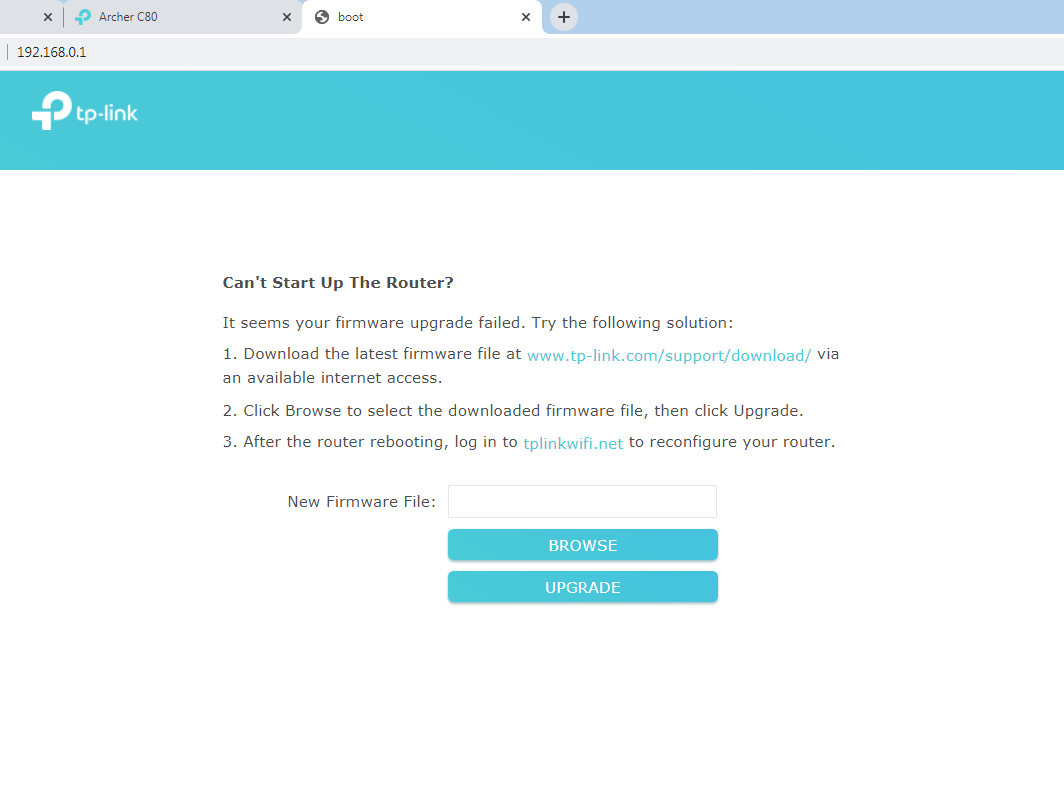
Step 4: Open the Router's Recovery Page at 192.168.0.1
Open a web browser and enter 192.168.0.1 in the address bar. Power cycle the router using the power button, wait a moment, and the recovery page will load. For the Archer C80, the page will display a prompt with instructions.
For Archer C80, the page will prompt you on what to do.
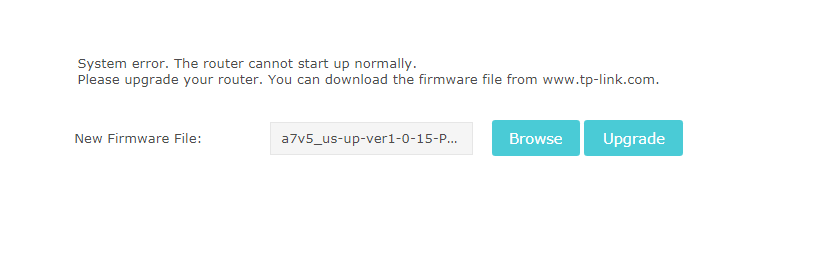
Step 5: Select the Firmware File and Begin the Upgrade
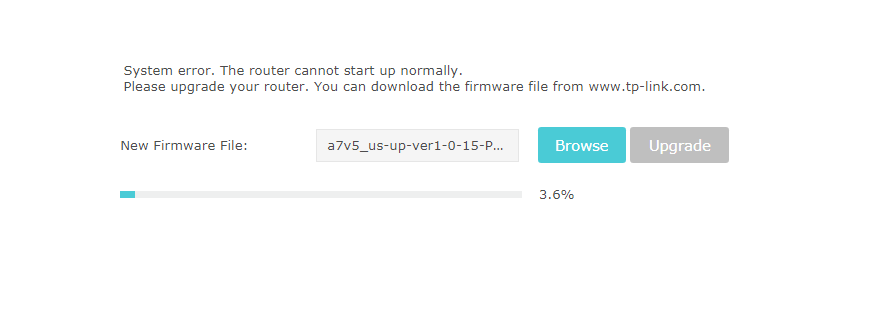
Click Browse, select the firmware file you extracted to your PC, then click Upgrade.
Step 6: Confirm Successful Recovery and Log In to Your Router
After the upgrade is complete, your router will restart. When all LEDs are stable, the router has recovered successfully. Log in at tplinkwifi.net or 192.168.0.1 to confirm. If you have trouble accessing the interface, see what to do if you can't log into the web-based interface of your TP-Link device.
Method 2: Rescue an Archer AX Series Router
How to Tell if Your Archer AX Router Has Been Bricked
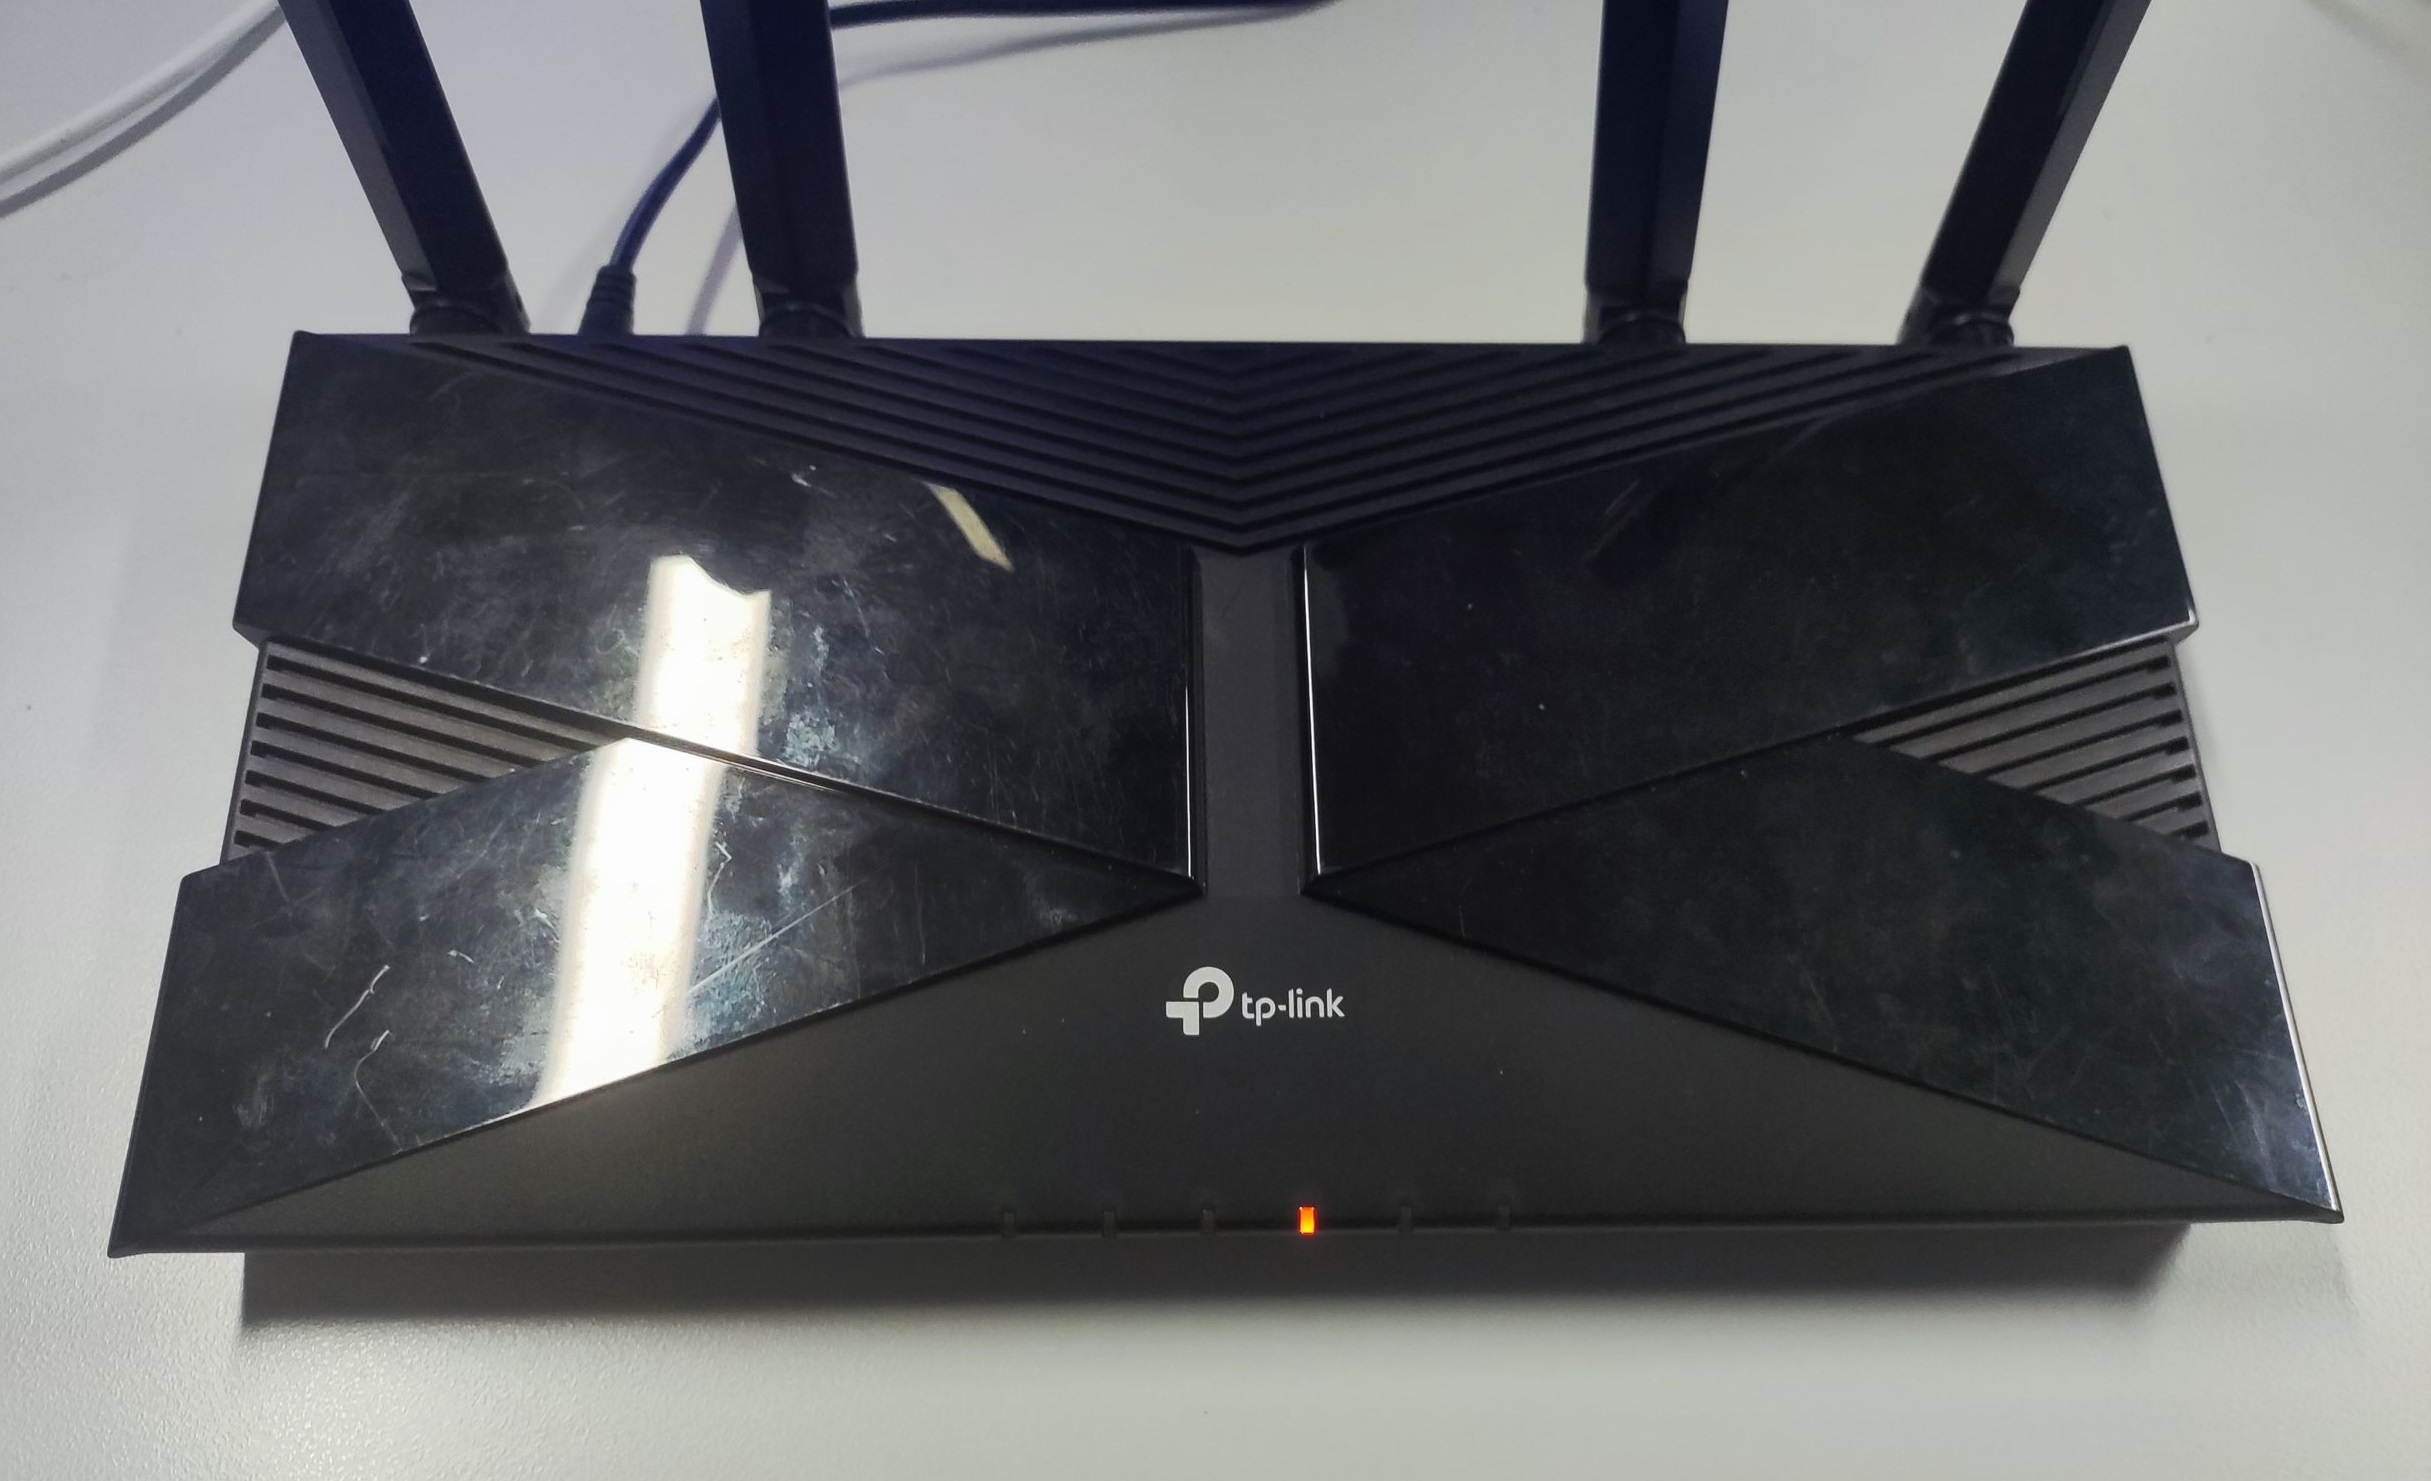
If your router has powered on but only a single LED lights orange in the middle, the router may have been bricked.
The Procedure to Do a Recovery
Step 1: Download the Latest Firmware for Your Archer AX Router
Download the latest firmware from the TP-Link Download Center, where you can search by model number. Your router's model number is printed on the label at the bottom of the device. After downloading, extract the zip file and locate the .bin firmware file inside.

Important: Download firmware only from the TP-Link official website for the country where your device was purchased. Using firmware from a different regional site may cause upgrade failure and affect the warranty. For related help, see what to do if a firmware upgrade fails on your TP-Link router.
Power off the router. Hold the WPS button (or Reset button on some models) on the back of the router, then power it back on. Hold the button for five seconds until only a single LED lights orange in the middle.

Step 3: Connect Your PC to the Router's LAN Port
Using an Ethernet cable, connect your PC directly to one of the router's LAN ports.
Step 4: Set a Static IP Address on Your PC
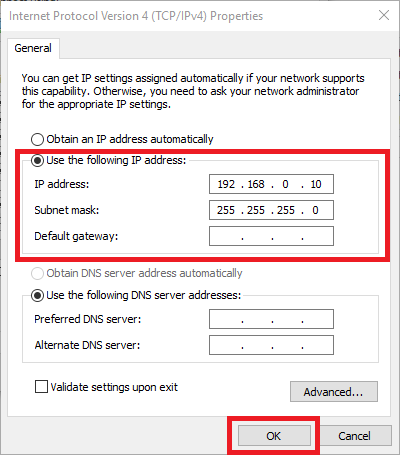
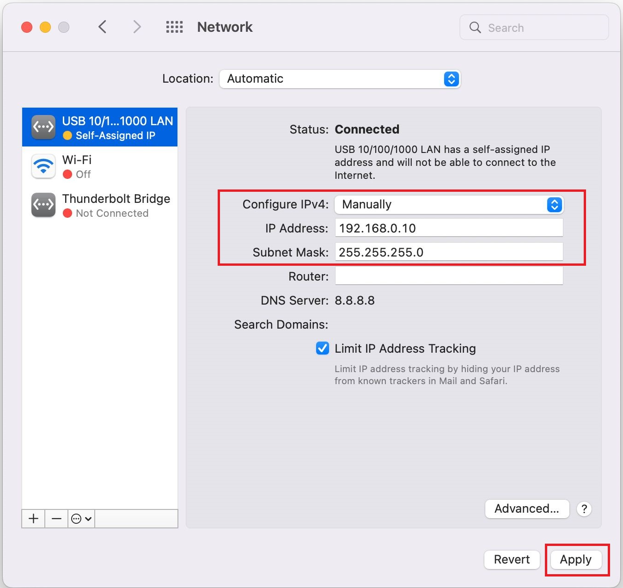
Set your PC's IP address to 192.168.0.10 and the subnet mask to 255.255.255.0 so it can communicate with the router in rescue mode.
For Windows:
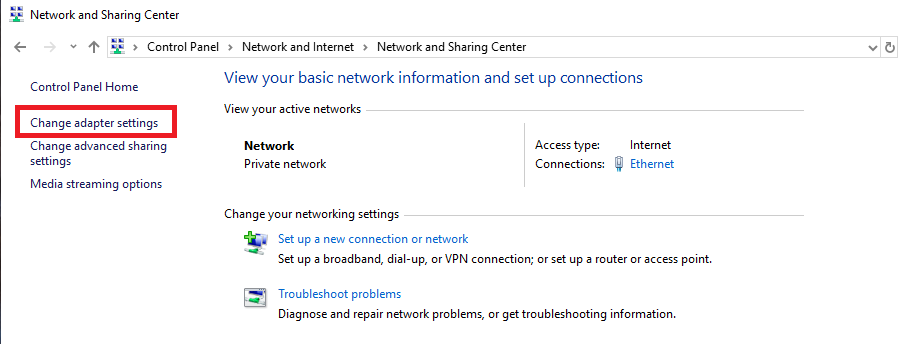
- Go to Control Panel, then Network and Internet, then Network and Sharing Center, and click Change adapter settings.
- Right-click the Ethernet adapter, choose Properties, then double-click Internet Protocol Version 4 (TCP/IPv4).

- Select Use the following IP address, fill in the fields as shown below, then click OK on both windows to save.
For macOS:
Go to System Preferences, then Network. Find the LAN connection, set Configure IPv4 to Manually, enter 192.168.0.10 as the IP address and 255.255.255.0 as the subnet mask, then click Apply.
Step 5: Access the Rescue Page at 192.168.0.1
Open a web browser and enter 192.168.0.1 in the address bar. The router's rescue mode page will appear.
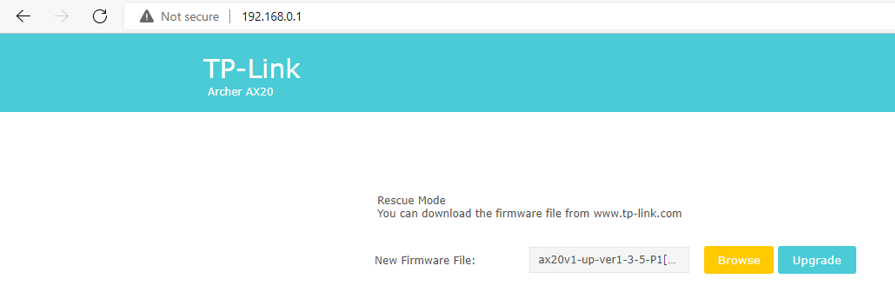
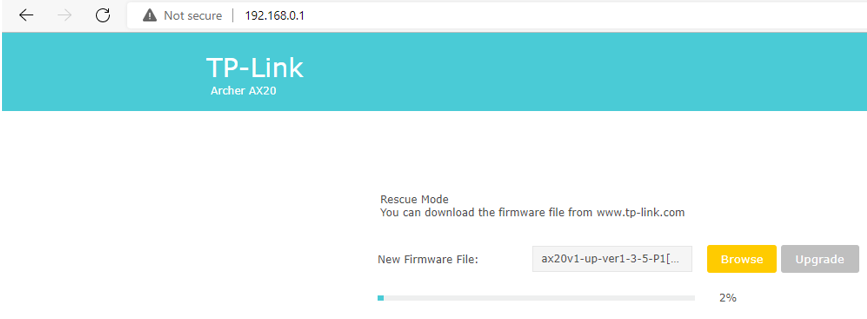
Step 6: Upload the Firmware and Begin Recovery
Warning: Do not power off the router during the upgrade. Doing so may cause upgrade failure or hardware damage and may affect the warranty.
Select the .bin firmware file, then click Upgrade. The router will recover and reboot automatically. This may take several minutes. For a full guide to standard firmware upgrades, see how to upgrade the firmware on TP-Link Wi-Fi routers.
Step 7: Restore Your PC's IP Settings and Complete Setup
When all LEDs on the router are stable, recovery is complete. Return to your PC's IP settings and set the IP address configuration back to Obtain an IP address automatically. You can then continue with your router's first-time setup. For additional help, see how to upgrade the firmware on TP-Link Wi-Fi routers.

Is this faq useful?
Your feedback helps improve this site.


TP-Link Community
Still need help? Search for answers, ask questions, and get help from TP-Link experts and other users around the world.