


How to change the host network on a configured range extender
User’s Application Scenario:
If you want to extend another host network after Quick Setup, you can refer to this section. Moreover, you can change the wireless settings for your extended networks.
How can I do that?
Here we take the configuration of the 2.4GHz network as an example. If the 5GHz network is available on your extender, please refer to the instructions to set your 5GHz network.
Method 1: Via Web Management Page
Step 1. Visit http://tplinkrepeater.net, and log in with the username and password you set for the extender.
Step 2. Go to Settings > Wireless > Connect to Network.
Step 3. Enable Connect to 2.4GHz Network and click Wireless Scanner to find all available networks.

Step 4. Select the 2.4GHz host network you want to extend.
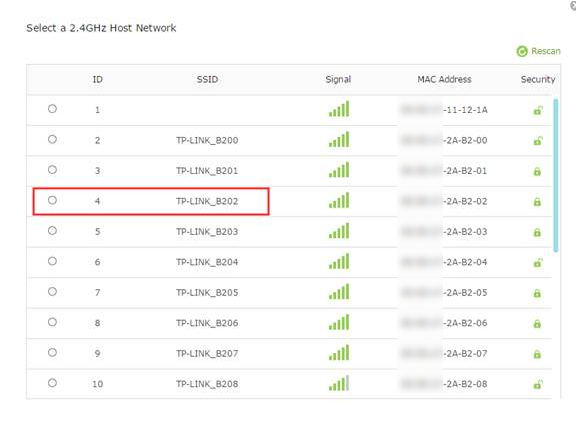
If you can’t fin the find the host network, see Cannot Find the Host Network When Setting up TP-Link Range Extender
Step 5. Once a host network is selected, the SSID and security type will be automatically filled in. If the selected network is encrypted, enter the password in the Password field.
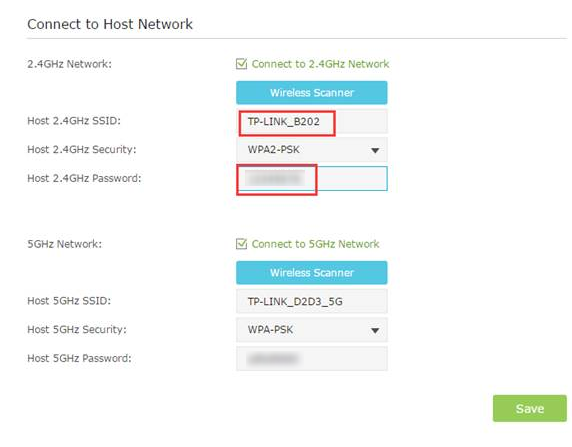
Step 6. Click Save.
Method 2: Via the Tether app
Here we take the RE500 as an example
Step 1. Check the compatibility list to ensure your range extender is compatible with the Tether App.
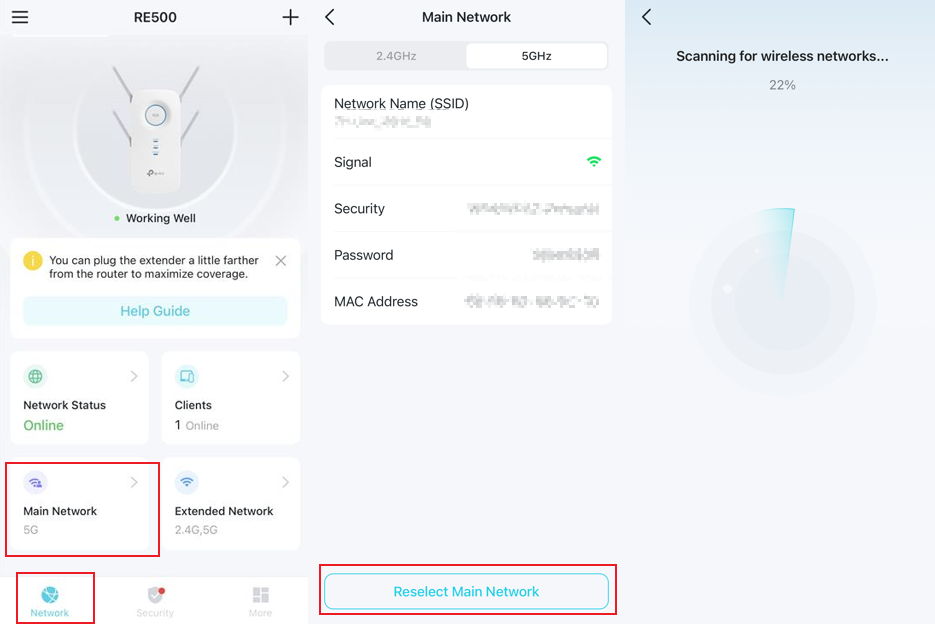
Step 3. Connect your phone/iPad to the range extender’s network, open the Tether app and log in to the extender with the device password.
Step 4. Tap the Main Network > reselect Main network and it will scan for available wireless network
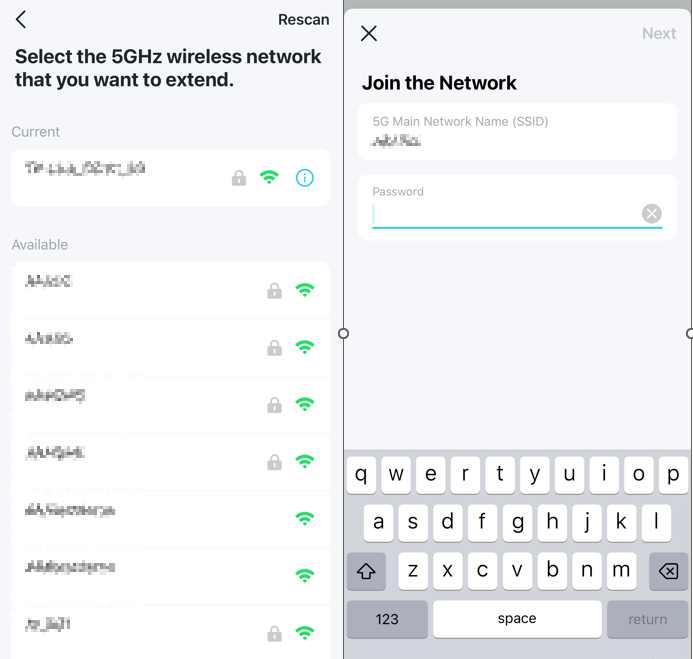
Step 5. Select the wireless network you want to change and enter the network password, then it will change to this network successfully.
Looking For More
Чи була ця стаття корисною?
Ваш відгук допомагає вдосконалити цей сайт.


TP-Link Community
Still need help? Search for answers, ask questions, and get help from TP-Link experts and other users around the world.