


How to Block or Allow Devices on Your TP-Link Router (Access Control)
Access Control is a built-in security feature that lets you choose which devices can and cannot connect to your network. This guide covers how to block devices connected to your Wi-Fi using Blacklist mode and restrict access to only approved devices using Whitelist mode. Both modes apply to wired and wireless connections.
Key Takeaways
- Access Control on TP-Link Wi-Fi routers lets you block or allow specific devices from accessing your network, covering both wired and wireless connections, using a Deny List or Allow List.
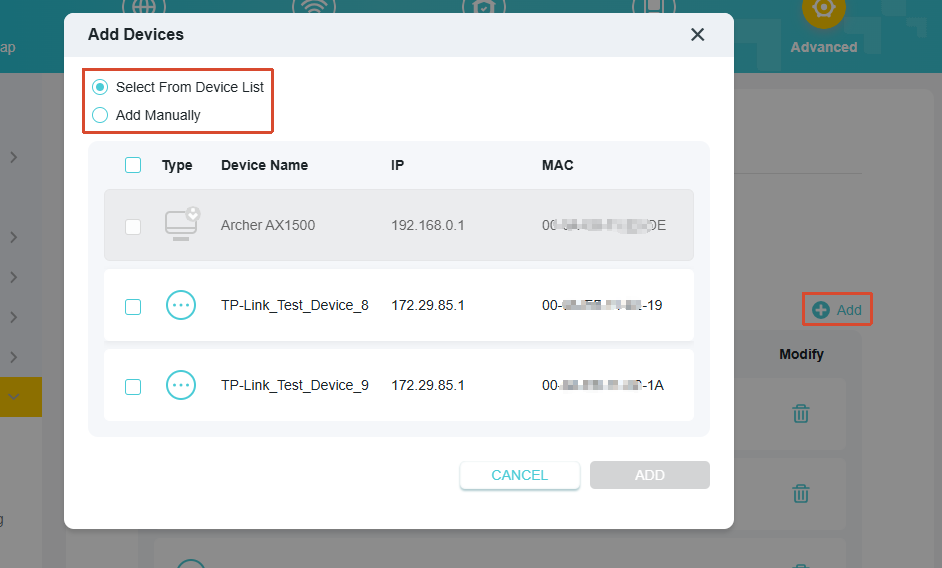
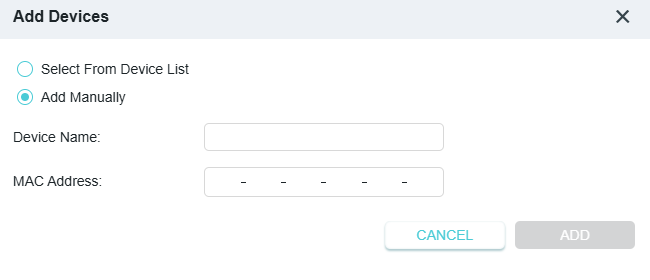
- When adding a device, you may select connected devices directly from the Online Devices table or enter the Device Name and MAC Address manually.
- Allow List mode restricts network access to only the devices you approve. Any device not on the Allow List will be unable to connect, even if it can detect the network.
How to Configure Access Control
1. Connect your device to the router via Wi-Fi or an Ethernet cable, open a browser, enter http://tplinkwifi.net/ in the address bar, and log in with your admin password.
2. Go to Advanced > Security > Access Control.
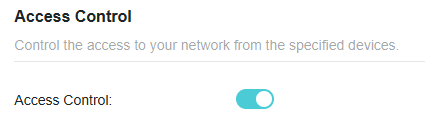
3. Enable Access Control.
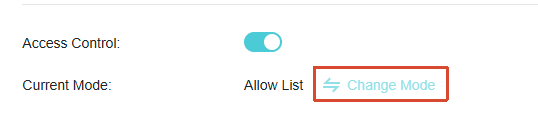
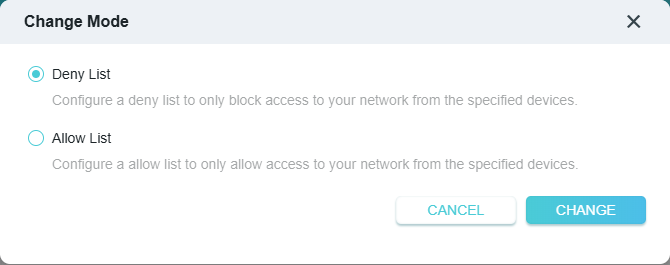
4. Click Change Mode, and select the mode needed:
Deny List mode: to block specific devices from your Wi-Fi network.
Allow List mode: to allow access only to specific devices.
5. Click Add to select the target device(s) or enter the Device Name and MAC address manually.
6. Click OK.
You can now control which devices connect to your TP-Link router using the Deny List or the Allow List.
Get to know more details of each function and configuration. Please go to Download Center to download the manual for your product.
Is this faq useful?
Your feedback helps improve this site.
3.0&4.0-F_normal_1584493102128p.png)

1.0_normal_20210812031127k.png)
TP-Link Community
Still need help? Search for answers, ask questions, and get help from TP-Link experts and other users around the world.