


How to Set Up a Wireless Schedule on a TP-Link Router to Automatically Turn Off Wi-Fi
The Wireless Schedule feature on your TP-Link router lets you automatically turn off Wi-Fi during specific time periods, helping you manage network usage or save energy. Setup takes just three steps through the router's web interface. You can add multiple schedules for different days or time windows, making the wireless schedule easy to customize for your household's needs.
Key Takeaways
- The Wireless Schedule feature lets you automatically turn off your TP-Link router's Wi-Fi during set time periods.
- Setup is done through the web interface at tplinkwifi.net under Advanced > Wireless > Wireless Settings.
- Multiple schedules can be added for different days or time windows.
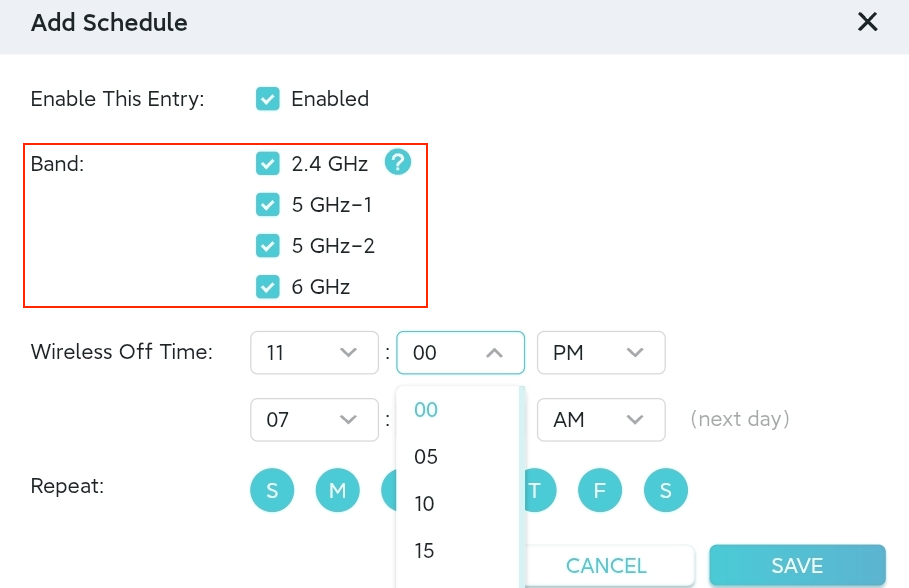
- On certain router models, specific Wi-Fi bands can remain active during scheduled off-time. Check your router's web interface for available options.
How to Set Up a Wi-Fi Schedule
Follow these steps to set up a wireless schedule on your TP-Link router.
Step 1. Connect to your router either via Wi-Fi or with an Ethernet cable. Open a web browser and enter https://tplinkwifi.net/. Log in with your router’s password.
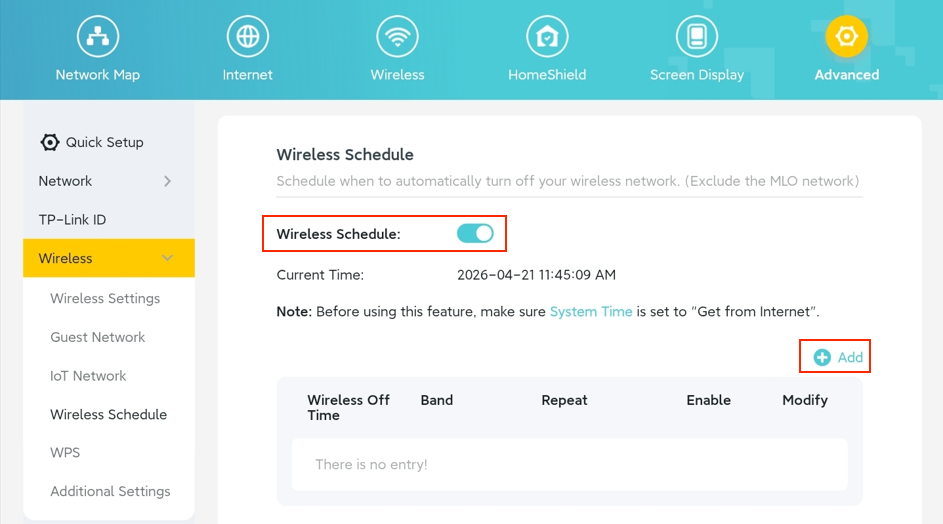
Step 2. Navigate to Advanced > Wireless > Wireless Settings, enable Wireless Schedule, and then click Add.
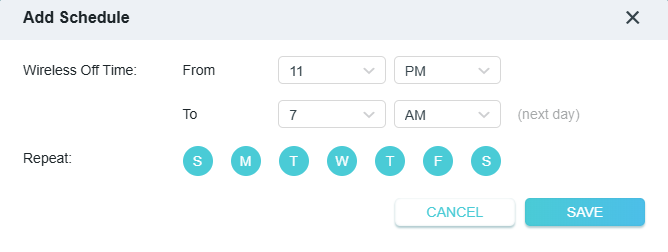
Step 3. In the pop-up window, set the start and end times and the repeat interval to turn off Wi-Fi, then click Save. You can add multiple schedules if needed.
Note: The layout and options on the Add Schedule page may vary by router model. Some models also allow you to keep certain Wi-Fi bands active during the scheduled off-time. Please refer to your router’s web interface for the exact settings available for your device.
Looking For More
Ez a GY.I.K. hasznos volt?
Véleménye segíti az oldal fejlesztését

3.0&4.0-F_normal_1584493102128p.png)


TP-Link Community
Still need help? Search for answers, ask questions, and get help from TP-Link experts and other users around the world.