


Deco VLAN ID Set Up: How to Configure Your TP-Link Internet Connection for ISP Requirements
Some Internet service providers (ISPs) require a VLAN ID (Virtual Local Area Network ID) to be configured on your router before you can establish an Internet connection. This page covers how to complete a Deco VLAN setup using the Deco app, including both the built-in ISP selection option and the custom VLAN ID TP-Link entry path for ISPs not in the list. If your Internet connection is already working, no changes are needed.
Key Takeaways
- Some ISPs require a VLAN ID to be configured on your router before you can establish an Internet connection. This setting is found in the Deco app under More > Advanced > IPTV/VLAN.
- If your ISP appears in the Deco app's built-in list, selecting it will automatically populate the correct VLAN ID. No manual entry is required.
- If your ISP is not in the list, select Custom and enter the Internet VLAN ID and Internet VLAN Priority provided by your ISP.
- If your ISP does not provide an Internet VLAN Priority value, enter 0.
- If your Internet connection is currently working, no changes to VLAN settings are needed.
What Is an Internet VLAN ID?
A VLAN ID is a number assigned by your ISP that tags your Internet traffic so it can be correctly identified and routed on a shared network. Some ISPs require this to be configured on your router before an Internet connection can be established.
Some ISPs like DoDo NBN and TPG FTTB in Australia need to configure a VLAN ID for the internet connection. This article will guide you to configure the VLAN ID on the Deco.
Before You Begin
- If your internet service is working fine, please ignore this article and just keep the current settings.
- In this article, we will take Deco M5 as an example.
- This article suits users who need to set a VLAN ID for an internet connection.
How to Configure VLAN ID on Deco
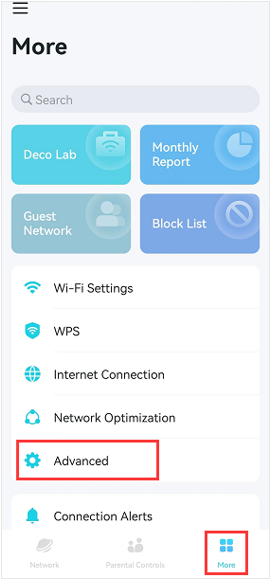
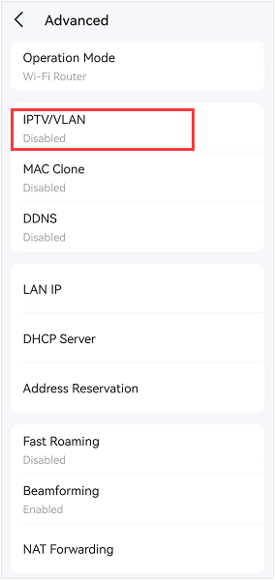
Step 1. In the Deco App, please go to More > Advanced > IPTV/VLAN.
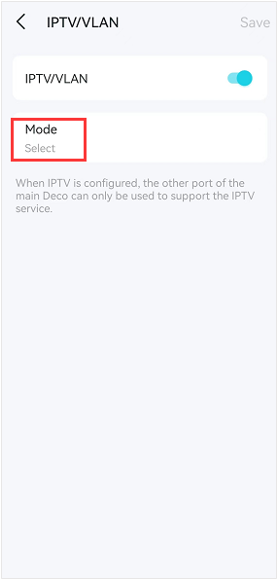
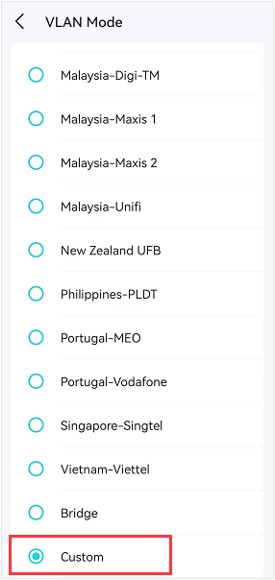
Step 2. Enable IPTV/VLAN, and click on Mode. If your ISP is on the list, tap your ISP name, and the VLAN ID will be entered on the VLAN page automatically. Here, we take "Australia-NBN" as an example.
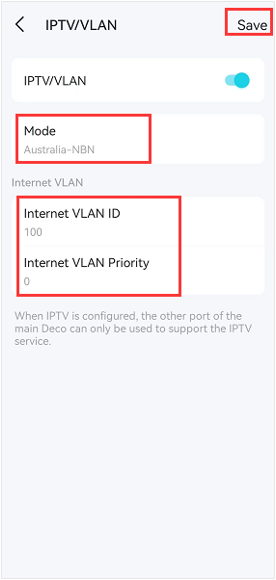
Step 3. If your ISP is not on the list, please select Custom, then enter the Internet VLAN ID and Internet VLAN Priority as provided by your ISP, and click Save to finish the setup process.
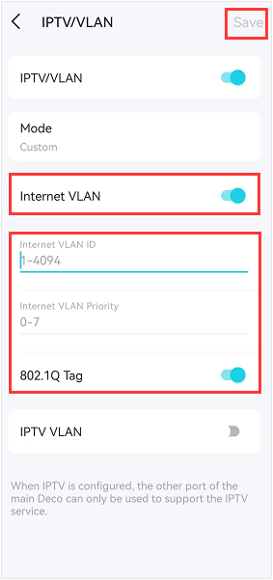
Note: If your ISP does not provide Internet VLAN Priority, you can enter 0.
Ищете больше информации?
Полезен ли этот FAQ?
Ваши отзывы помогают улучшить этот сайт.
_normal_20230202012857u.png)


TP-Link Community
Still need help? Search for answers, ask questions, and get help from TP-Link experts and other users around the world.
From United States?
Получайте информацию о продуктах, событиях и услугах для вашего региона.