


How to Add a Satellite Router or Extender to Your EasyMesh Network
EasyMesh allows compatible routers and extenders to work together as a unified Wi-Fi network, providing seamless coverage throughout your home. This guide covers three methods to add a satellite to your TP-Link router’s EasyMesh network:
- WPS Button (Recommended for all devices)
- Web UI Scan (For adding TP-Link routers)
- Quick Setup (For adding TP-Link extenders)
Note: Not all TP-Link devices support satellite mode (e.g., DSL/4G/5G routers can only act as the main unit).
Before You Begin
- Ensure both the main router and satellite devices support the EasyMesh feature by checking the EasyMesh Compatibility List.
- Ensure both devices run the latest firmware (Guide: upgrade routers, upgrade extenders)
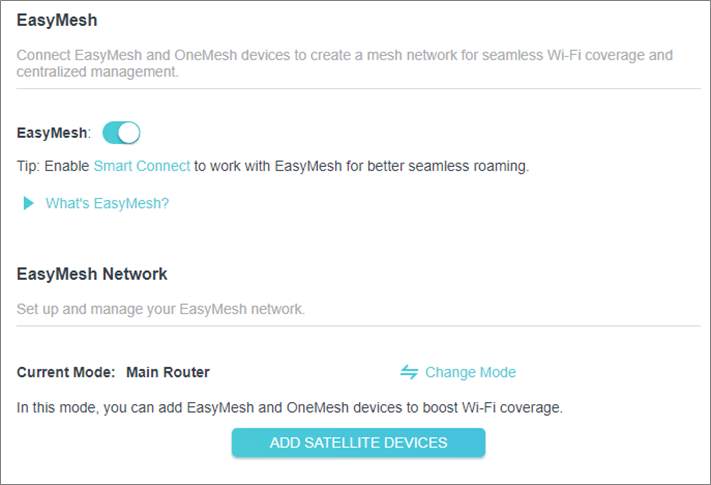
- The EasyMesh feature is on by default. If disabled, re-enable it in the main router’s settings (Advanced > EasyMesh).
Configuration Methods
Method 1: WPS Button (Fastest Setup for All Devices)
Step 1. Prepare the satellite device.
Power on the satellite device near the main router.
Reset the satellite devices to factory default. (Guides: reset routers, reset extenders )
Step 2. Pair Devices via WPS.
Press the WPS button on the main router. Wait for its LED to blink.
Within 2 minutes, press the WPS button on the satellite. Its LED will stabilize when connected.
Step 3. Relocate.
Relocate the satellite to extend coverage (stay within the main router’s range).
Method 2: Web UI Scan (For adding TP-Link Routers)
Step 1. Access the main router management page.
Connect your device to the router via Wi-Fi or an Ethernet cable.
Open a web browser, enter https://tplinkwifi.net, and log in.
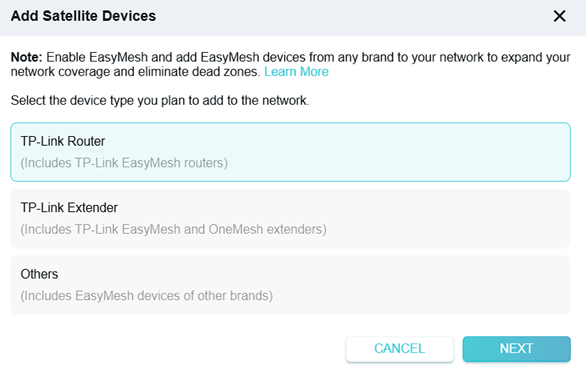
Step 2. Add Satellite Devices.
Go to Advanced > EasyMesh > Add Satellite Devices.
Follow on-screen prompts to scan and add your satellite router.
Method 3. Quick Setup (For adding TP-Link Extenders)
Step 1. Prepare the extender.
Power on the extender near the main router.
Reset the extender to factory default.
Step 2. Access Extender Settings.
Connect your device to the extender via Wi-Fi or an Ethernet cable, then:
- Web: Enter https://tplinkrepeater.net in the address bar.
- App: Open TP-Link Tether, tap the extender under Devices.
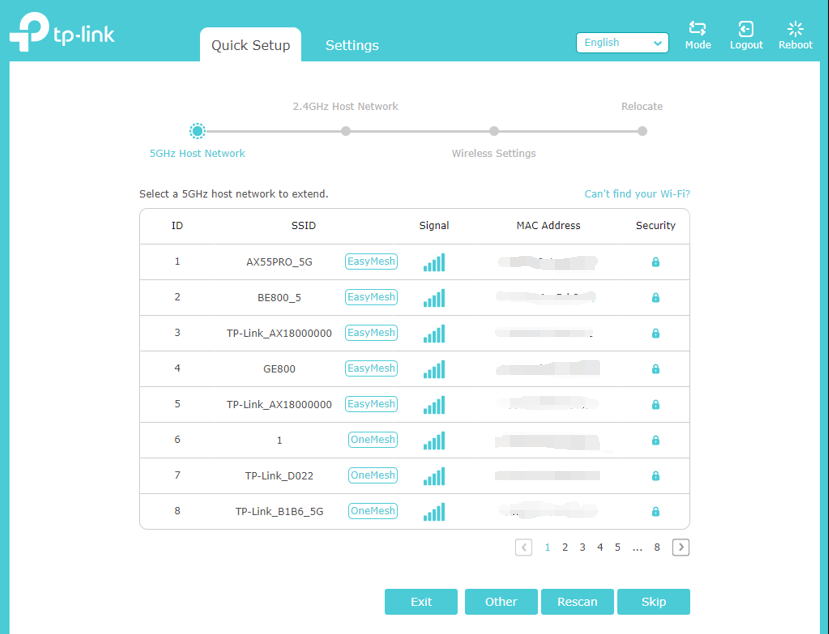
Step 3. Go through the Quick Setup.
Ensure the main router’s Wi-Fi has an EasyMesh/OneMesh icon before selecting it.
Follow the on-screen instructions to complete the setup.
Note: The app may show "OneMesh" even for EasyMesh devices (will sync after firmware updates).
How to Verify Successful Setup
Via LED Status
- For TP-Link Wi-Fi 7 routers, all LEDs will be solid on.
- For other TP-Link routers, Internet LED should be solid green/white.
- For TP-Link range extenders, the 2.4G, 5G, and Signal LEDs will be solid on.
Note: the LED status varies by model. Check the product’s User Guide for accurate information.
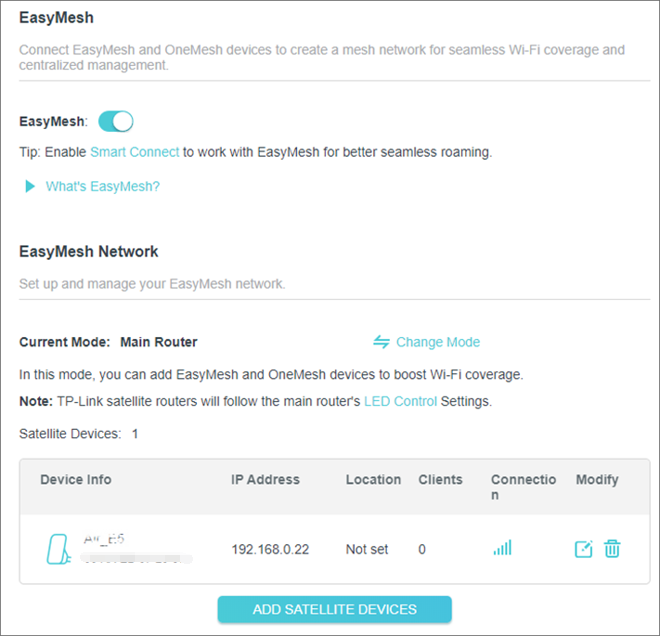
Via Web UI
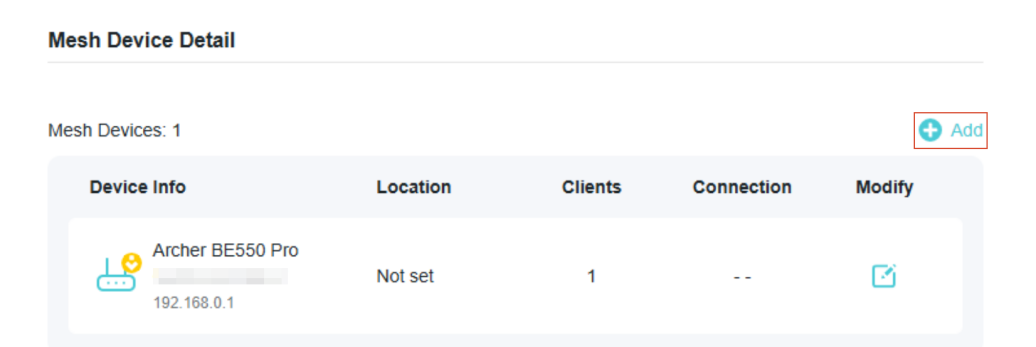
Go to Advanced > EasyMesh on the main router. The satellite will appear in the Mesh device list.
Looking For More
Is this faq useful?
Your feedback helps improve this site.

1.0_normal_20210812031127k.png)

TP-Link Community
Still need help? Search for answers, ask questions, and get help from TP-Link experts and other users around the world.